
Tutorial Builder: Top tools
Now for a deeper dive into the Tutorial Builder. (To understand the basics, read Tutorial Builder Basics .)
At the top of the Tutorial Builder, you'll see icons to control how your tutorial looks. Using these tools, you can change text formats or add assets like diagrams, videos, and runnable Tynker projects.
Let's take a look at each one.

Force Focus Tool. As your reader advances through the tutorial, you can switch their focus to different actors. That is, rather than telling the reader, "Don't forget to switch to the Apple actor," you can simply select the Apple actor in this dropdown, and the reader's focus will switch automatically as they flip the pages of your tutorial. Each page of the tutorial can have its own Actor to force focus upon.
Text Formatting. Click on the Aa button, and a text-formatting tool will appear (shown below). You can select the style (Heading, Subtitle, or Normal) as well as other formatting choices like: Bold, Italics, Underline, and ⏺ Bullets. Keyboard shortcuts like CTRL-B for bold work for basic formatting too.

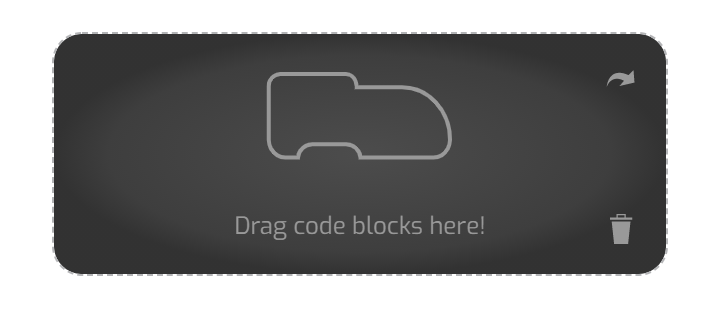
Insert a Block. The whole point of writing your Tutorial is to provide draggable code blocks to your reader. This button will create a block placeholder, where you can add code blocks. The placeholder looks like this:
Once the placeholder is in the Tutorial sidebar, you can drag blocks into it from the Code Area. Then these blocks will be available as "live code blocks" for your reader—that is, readers are able to drag them right into their project as they read! Cool.
Organize, attach, and detach the code blocks however you like, in order to make your tutorial more readable or to provide a challenge!
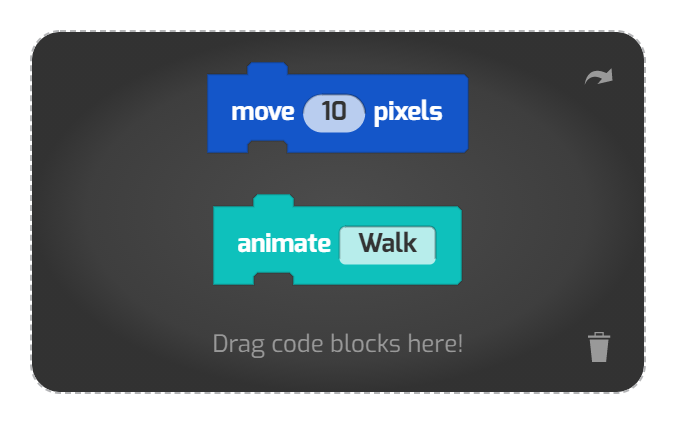
HINT: Code blocks in tutorials can be set to "live" (draggable by the reader) or to "read only." You can make a block "read only" by clicking on the arrow in the upper right corner of the placeholder. As you click, the icon will switch:

Live Code Icon (code will be draggable by the reader).

Read-Only Code Icon (code is just an image, cannot be dragged into the project).
Swap between the two, then read your tutorial to get an idea of how it affects your code. For example, read-only code blocks allow you to provide "checkpoint" images of what students' code should look like. Or you can make all the code in your tutorial "read only" to give readers a greater challenge:
Add Audio. Don't have time to write up your idea? Or want to add a personal touch? Add an audio recording with this button. You can add your own "voice over" too by reading your instructions aloud.
Templates. Some things come up so often in tutorials, such as "Changing the Stage's Backgrounds" or "Adding a New Actor," that simple insertable templates (text snippets and images) have been provided for these common scenarios.
Embed Media. You can also insert playable Tynker projects or embed a video in your project.
Show HTML Source (recommended for geeks only). This button reveals the raw HTML source of your tutorial. Use with caution.