
Quick Start Guide for Teachers
Welcome!
With your Tynker educator account, you can create classrooms, add students, assign lessons, monitor student progress, and access comprehensive lesson guides.
* This document is for educators with a Tynker Teacher account. Please use the Quick Start Guide for Administrators if you have a District Administrator or School Administrator account.
What is Tynker?
Tynker is a creative computing platform designed to make it easy for educators without computer science experience to teach coding. Our classroom management tools, educator resources, and automatic assessment tools allow teachers to seamlessly incorporate coding with subjects such as Science, Language Arts, Math, and Social Studies.
How Kids Learn
Learning to code is personalized with Tynker’s fun, open-ended curriculum that lets students progress at their own pace by introducing multiple computing concepts simultaneously. Students can master concepts through interactive tutorials, critical thinking puzzles, video explanations, and DIY projects.
Tynker’s lessons engage students because they can use what they’ve learned to tell interactive stories, program animations, code games, build STEM projects, control drones, micro:bits and robots, and much more. Over 60 million students worldwide have used Tynker to learn coding and make incredible projects.
Quizzes and coding challenges reinforce concepts and assess how students are doing. Students can demonstrate what they’ve learned through expansive creativity tools that give them the ability to make anything they can imagine, allowing teachers to assist students who need it most.
As an educator, you’ll need to:
Set up your account
Add classrooms and students
Assign lessons
Monitor student progress
Step 1: Set up your account
Tynker has four types of educator accounts: District Administrator, School Administrator, Teacher, and Student. Each account has different capabilities.
To get started, you’ll need to set up your Teacher account. If your school has purchased a Tynker for Schools plan, follow the instructions in the “For Premium Accounts” section to ensure that you have access to the curriculum your school purchased.
For Free Accounts
Go to www.tynker.com and click the Join For Free button.
Create a new Teacher account, or sign in to Tynker using a Google, Microsoft, or Apple account. You’ll use this method every time you log in.
Tynker Login: Provide an email address and a password, then your full name. Tynker will send you a verification email; *you must verify your account before continuing.
Google, Microsoft, or Apple Account: Use your Google, Microsoft, or Apple account to sign in. You don’t need a Tynker password to log in using this method.
For Premium Accounts
Look for a welcome email from Tynker. If you didn't receive it, please ask the Tynker School Administrator for your school or district to send you an email invite.
Sign in to your Tynker account using the method you used during signup or using the credentials sent to you by your Tynker School Administrator. You may sign in using an email, Google account, Microsoft account, Apple account, ClassLink login, or Clever login.
Step 2: Add classrooms and students
Tynker has many built-in classroom and student management features to make getting started easy. If your school is set up with Google Classroom, ClassLink, or Clever, you can use these services to synchronize roster information with Tynker automatically. You can create a classroom manually if you don’t use these services. Once your classroom is created, you can begin adding students and assigning coursework.
Depending on how your school is set up, your Tynker School or District Administrator may prefer to create all student accounts using Clever or CSV file import. If your students already have Tynker accounts, you can skip forward to "Step 3: Assign Lessons". See the Quick Start Administrator Guide for more information on the tools available to Tynker Administrators.
Adding Student Accounts
Tynker supports several methods for adding students to your classrooms. Plus, both the Tynker School Administrator and the Teacher can use their dashboards to add student accounts.
Class Code: Students can join a class by visiting tynker.com/classcode, entering the class code you provide, and logging in with their existing Google, Microsoft, or Clever credentials.
Generate For Me: Allow Tynker to generate usernames and passwords for student accounts. Usernames can be generated with a custom prefix.
Create My Own: Manually create individual Tynker accounts with custom usernames and passwords
Bulk Import: Import students into multiple classrooms. Use this approach if you’re teaching multiple groups of students and already know the groupings for each class.
*You can use any combination of these methods.
The tools will work for both new and existing accounts. When you add students, the system automatically checks whether the information you enter is associated with an existing student account. Existing accounts are updated with new classroom information and don’t lose any previous class data. All other accounts are generated and added to the classroom. That means you can use these tools again whenever a new semester begins.
Note: Don’t add your Teacher account as a student in your own classroom. You’ll be able to go through any lesson module that students can access from your educator dashboard.
Using Tynker with Google Classroom
Sign in to Tynker using the Google Single Sign-on option, and click “Create New Classroom” on the My Classrooms page.
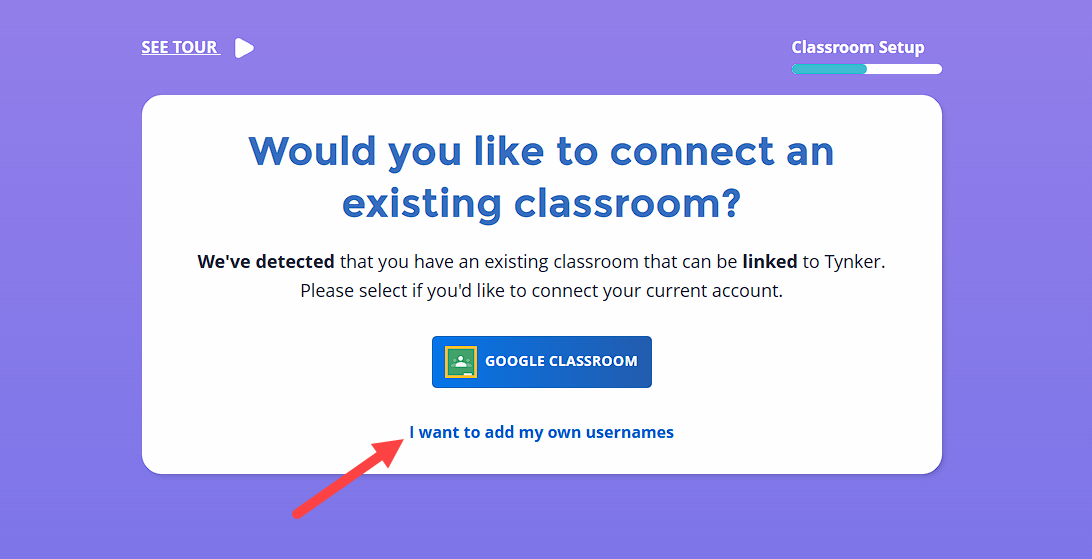
Tynker will automatically detect if you have Google Classroom. Simply select the Google Classroom button.
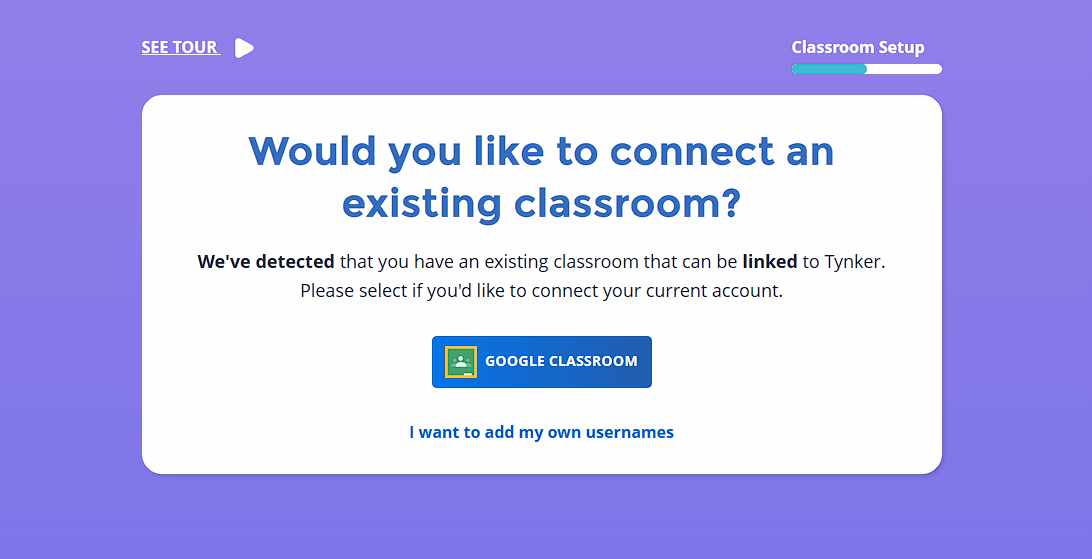
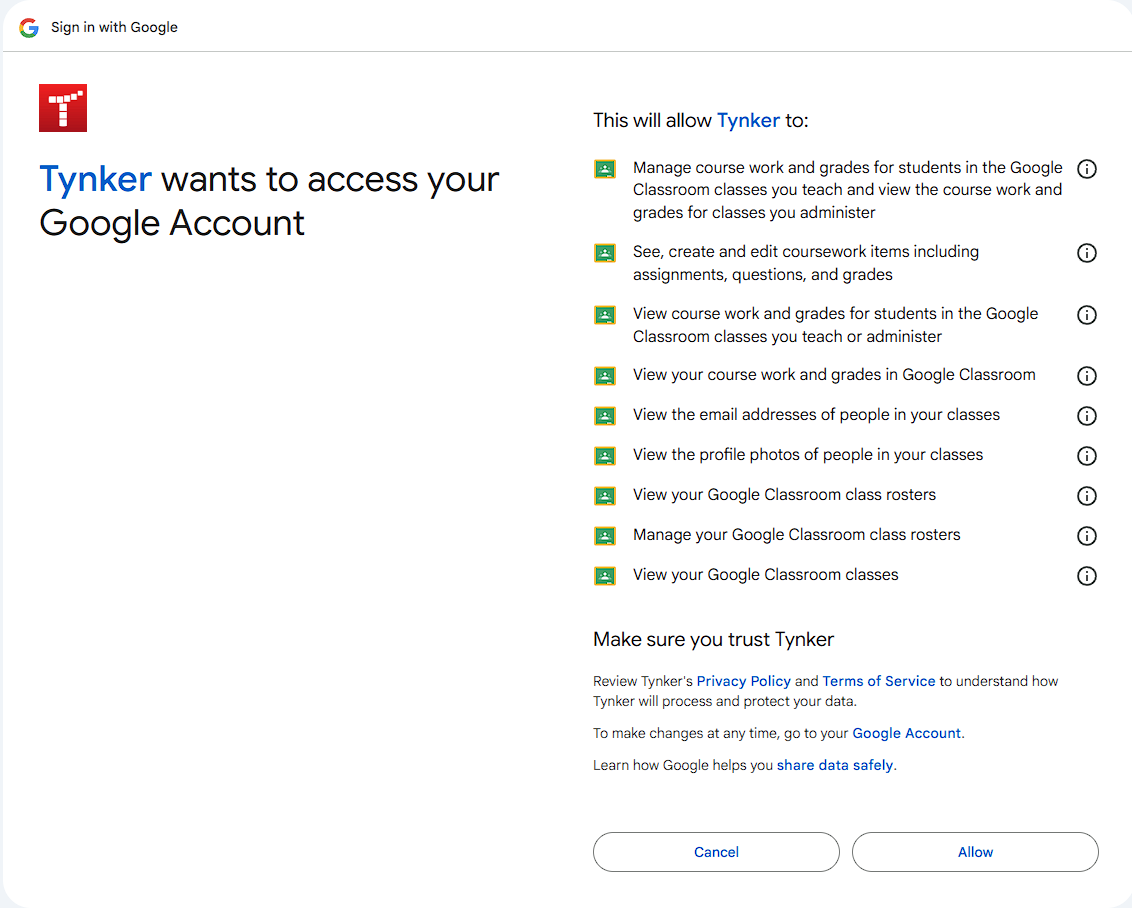
You should see a pop-up from Google asking you to give Tynker permission to access your Google Classroom. Be sure to give Tynker permission, or the next steps won’t work.
Choose which Google Classroom roster you want to add, choose the grade band, and click Link Classroom. Your students will be automatically imported. If you add or remove any students in Google Classroom, you can use the “Sync” option under the Students tab to update the roster in Tynker.
Using Tynker with Clever (Free Accounts)
If your school uses Clever with a free account, and Tynker Login has been enabled on your school’s Clever console, this option will let you roster students via a class code.
Click on Tynker Login within Clever to sign into Tynker.
Click “Create New Classroom” on the My Classrooms page.
Give your class a name and grade band, then click continue.
Click the Clever logo, copy the class code, give the class code to students, and then click Finish and Go to Classroom.
Students would then go to tynker.com/classcode, enter the class code, click the Clever button, and sign in with their Clever credentials.
Using Tynker with Clever (Premium Accounts)
If your school uses Clever with a premium license, and Tynker Premium has been enabled on your school’s Clever console, this option will let you link your Clever classrooms and sync rosters with one click.
Sign in to Tynker from Clever using the Tynker Login Application, and click “Create New Classroom” on the My Classrooms page.
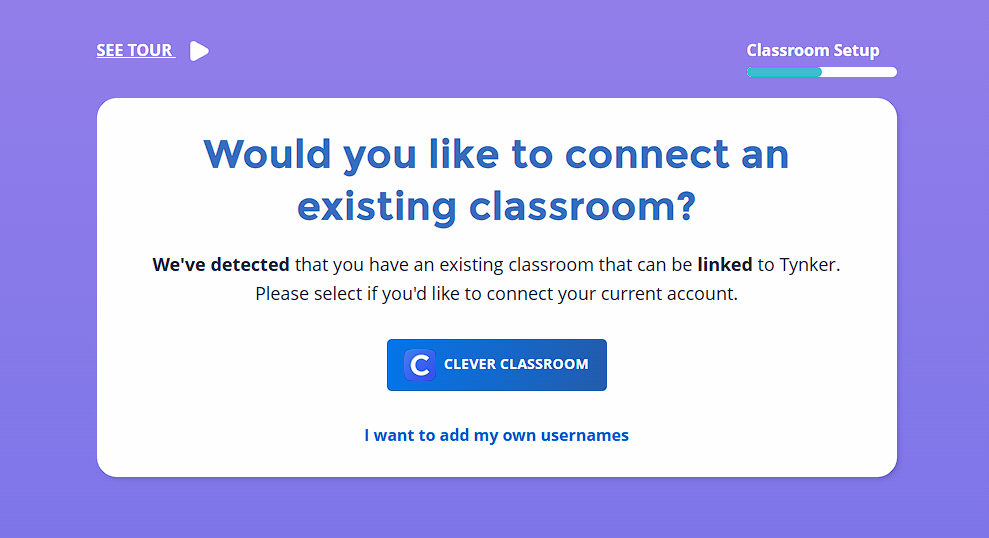
Tynker will automatically detect if you have Clever. Simply select the Clever button.
Choose which Clever roster you would like to add, choose the grade band, and click Link Classroom. Your students will be automatically imported. Student additions and removals will automatically be made every 24 hours.
Using Tynker with ClassLink
If your school uses ClassLink, and Tynker has been enabled on your school’s ClassLink console, this option will let you link your ClassLink classrooms and sync rosters with one click.
Sign in to Tynker from ClassLink, and click “Create New Classroom” on the My Classrooms page.
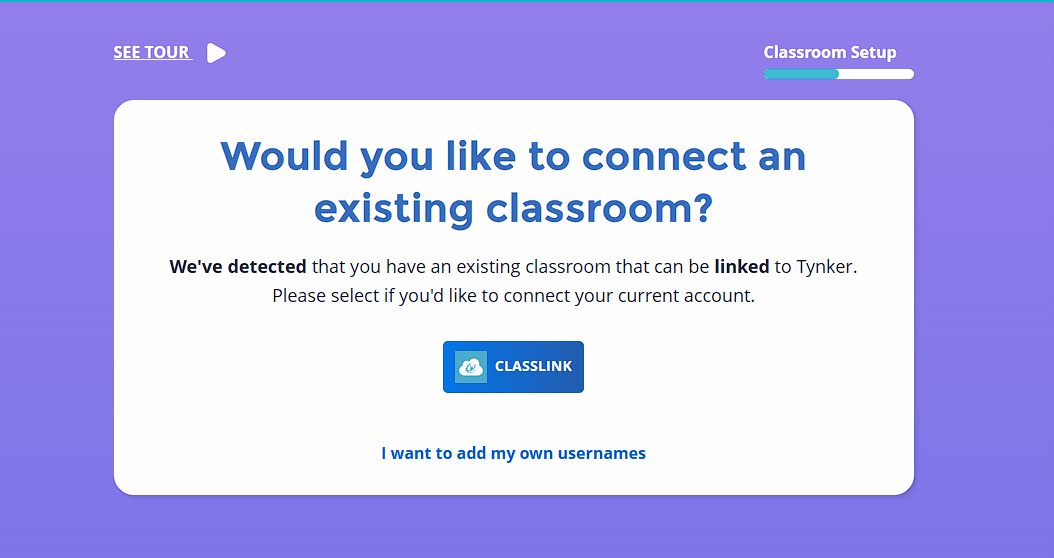
Tynker will automatically detect if you have ClassLink. Simply select the ClassLink button.
Choose which ClassLink roster you would like to add, choose the grade band, and click Link Classroom. Your students will be automatically imported. Student additions and removals will automatically be made every 24 hours.
Manually Adding Classrooms in Tynker
You may create any number of virtual classrooms with your Tynker educator account.
Click the Create New Classroom button.
If you are using a Google, Clever, or Classlink account, click the “I want to add my own usernames” link to enter the manual class creation process. If you use a Tynker or Microsoft account, you will be automatically directed to that process.
Choose the class grade band, give the class a name, and click continue.
There are several ways to manually add students to your classrooms.
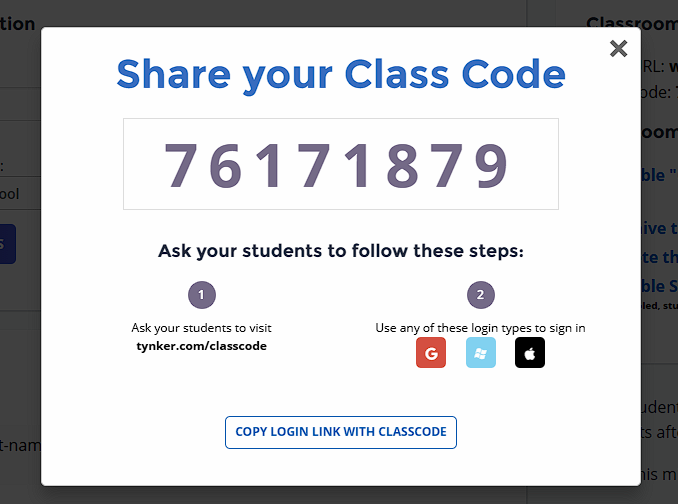
Class Code: Once a Tynker classroom is created a unique Class Code is automatically assigned to the classroom:
If all of your students have a school Google, Microsoft, or Apple credential, this is a simple way to set up your classroom.
Students with school Google, Microsoft, Clever, or Apple credentials can log in for the first time by taking the following steps:
Go to tynker.com/classcode
Enter the Class Code
Click the Google, Microsoft, Clever, or Apple button based on the type of credential.
Login with existing school or district credentials
Students with existing accounts can join this class by clicking on their Join Class button on their My Classes page or from within their profile.
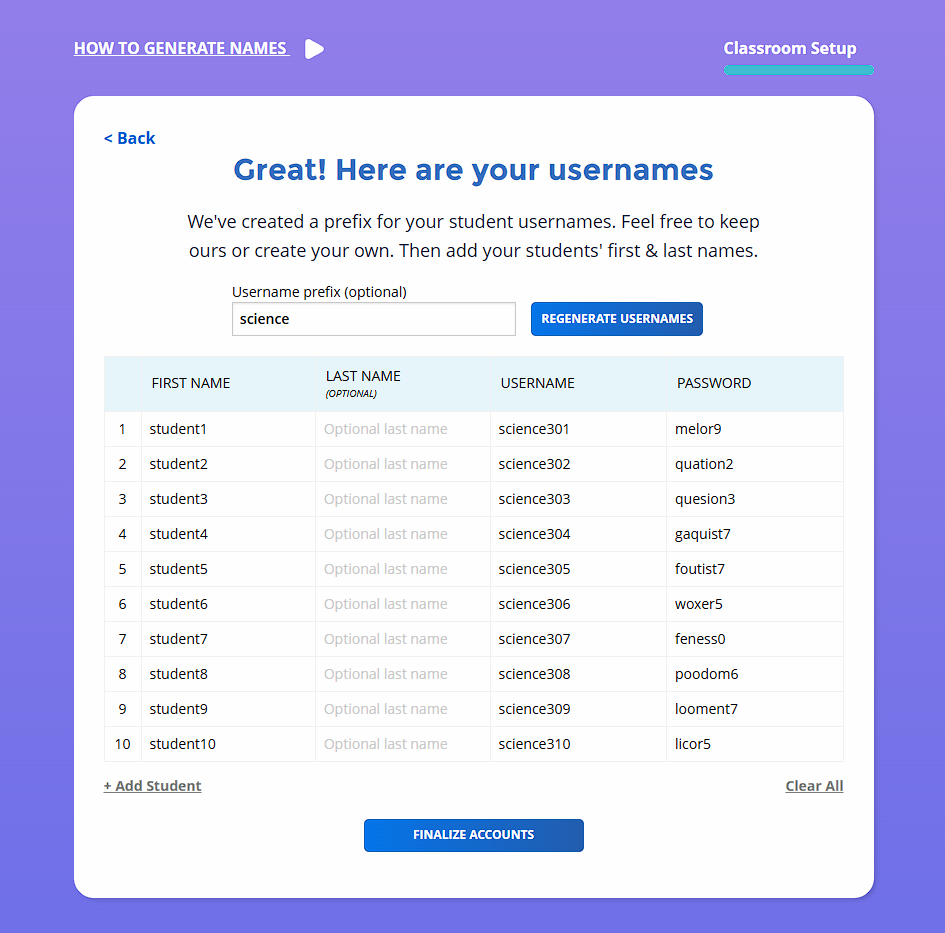
Generate For Me: Begin by clicking Create Tynker Accounts. Choose how many accounts you want to create, and use the Generate For Me button. You can choose a prefix for all usernames to start with, and you need to add first names. Click Finalize Accounts to complete adding student accounts.
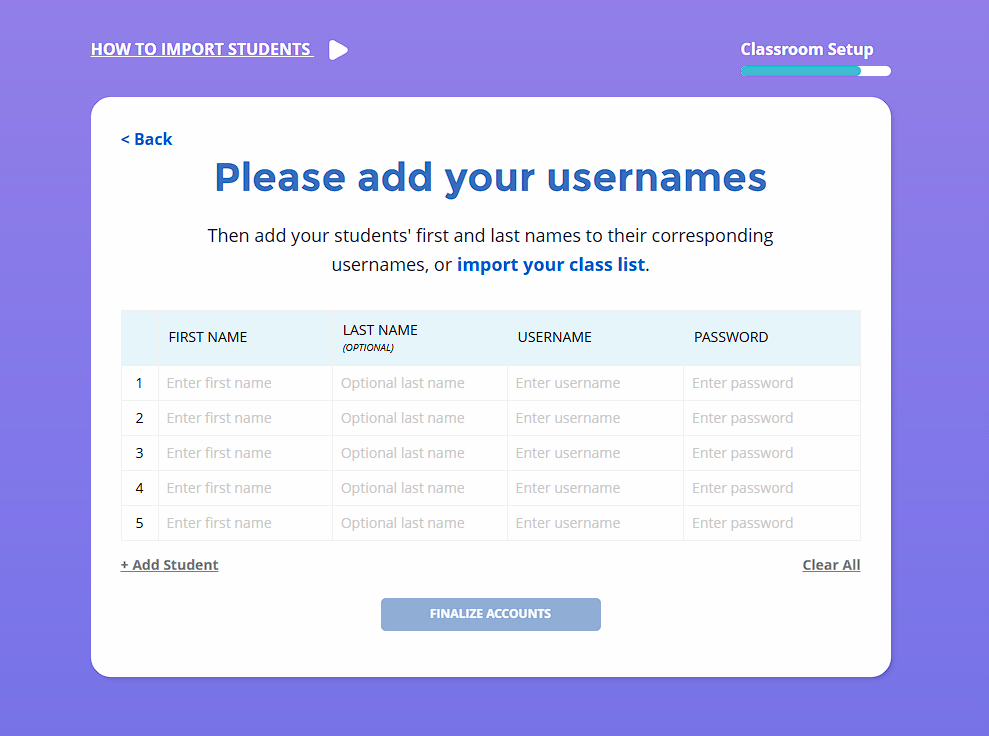
Create My Own: Begin by clicking Create Tynker Accounts. Choose how many accounts you want to create, and Use the Create My Own button. Add students' first names, last names, usernames, and passwords. Click Finalize Accounts to complete adding student accounts.
Bulk importing students and classrooms
This method allows you to import all of your students into their respective classrooms using a single CSV file upload. Entire classrooms can be added this way. The following types of imports are supported:
Import students that use Google accounts (Sample CSV)
Import students that use Tynker accounts (Sample CSV)
Here is an example CSV for multiple classrooms, using Google logins for students.
Class | Login |
Big Bird’s Intro to Programming | ernie5@sesamestreet.edu |
Big Bird’s Intro to Programming | elmo1@sesamestreet.edu |
Big Bird’s Intermediate Coding | oscar3@sesamestreet.edu |
To perform a bulk import, follow these steps:
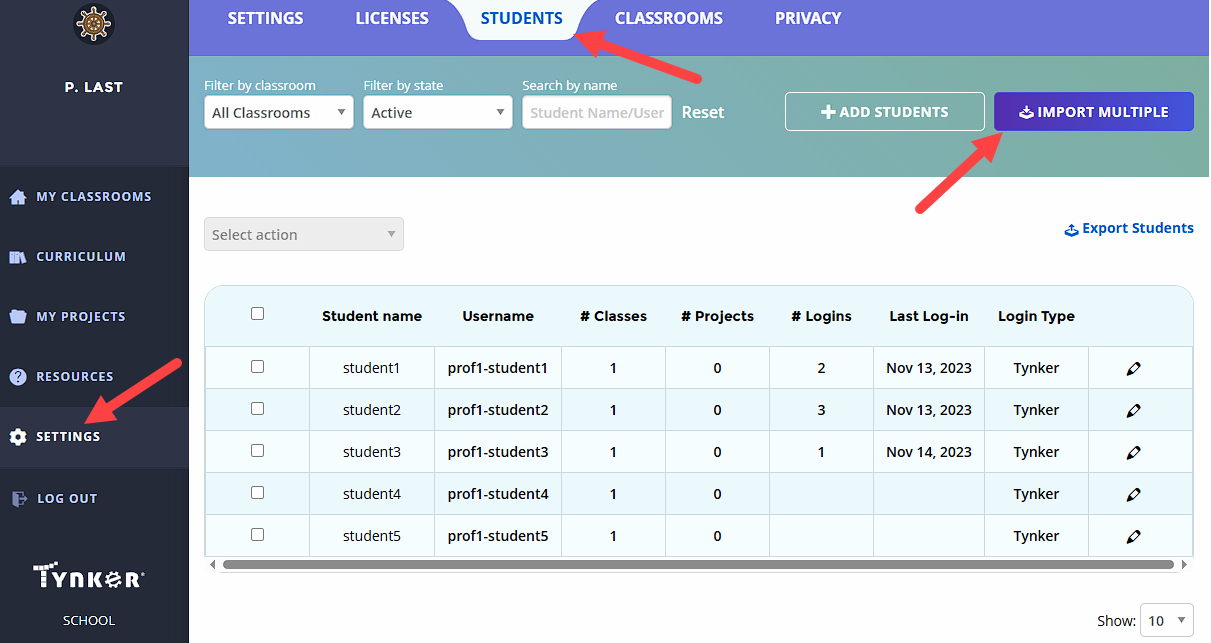
Click on Settings in your left navigation panel.
Click on the Students tab.
Click Import Multiple to initiate the bulk-import wizard.
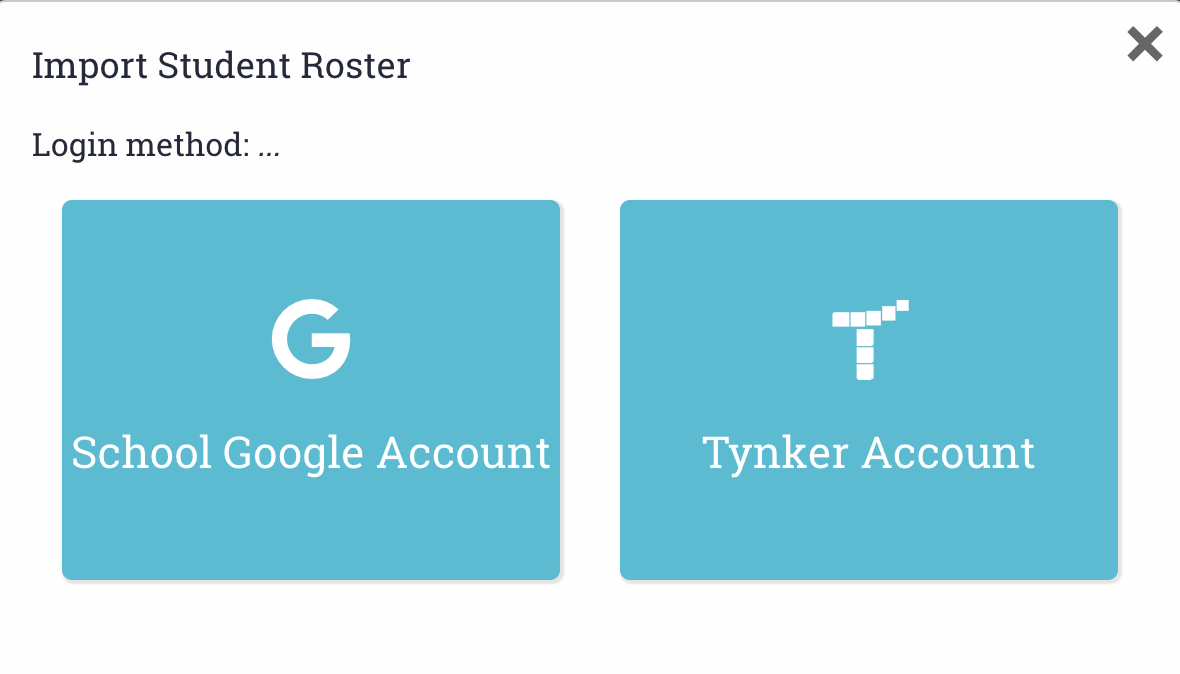
Choose a login method for students. Note that if you select Google Accounts rather than Tynker Accounts, you’ll only have to enter student emails into the CSV file. Use the samples provided to add your students.
Use Google Sheets or a spreadsheet editor like Microsoft Excel to add all the students under the headers. The only fields that can be left blank are the passwords, which if you don’t fill in, will be automatically generated.
Download/save the file as a CSV file.
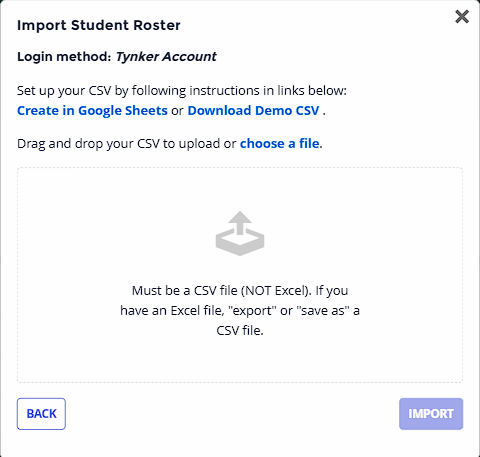
Upload your CSV file formatted exactly like the demo CSV file.
Click Import to start the bulk import.
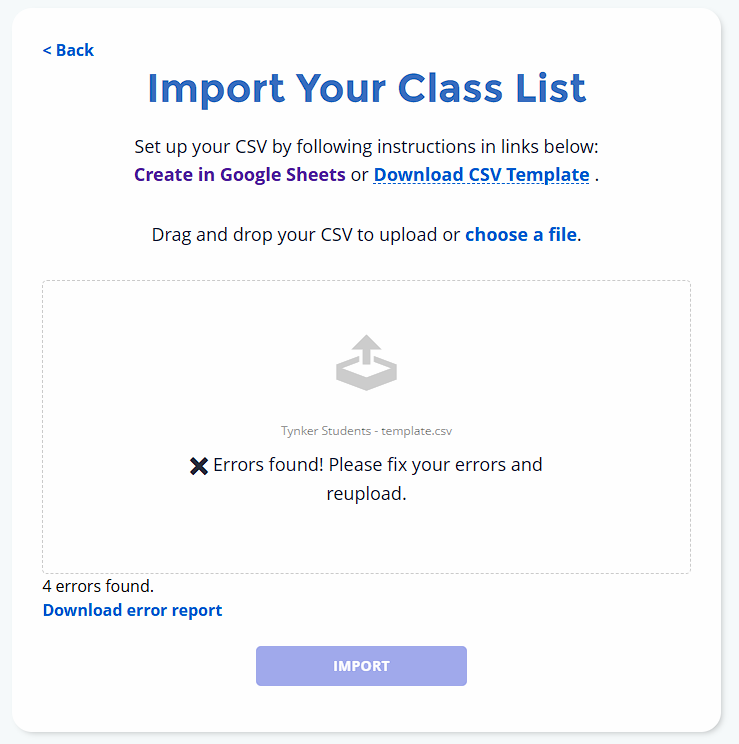
If there are any errors, you’ll be notified by the Preflight Error Checking process. See section below for more information about fixing CSV errors.
Preflight Error Checking
When you’re ready to import your CSV file, Tynker will perform a preflight error check just to make sure that your roster file is valid, flagging common errors such as missing fields and duplicate users. After the check is run, download the error report, fix all the issues, and re-import the CSV file.
Repeat this process until there are no more errors and then Click Import to import all your setup data into Tynker.
If you have any trouble, reach out to us at schools@tynker.com.
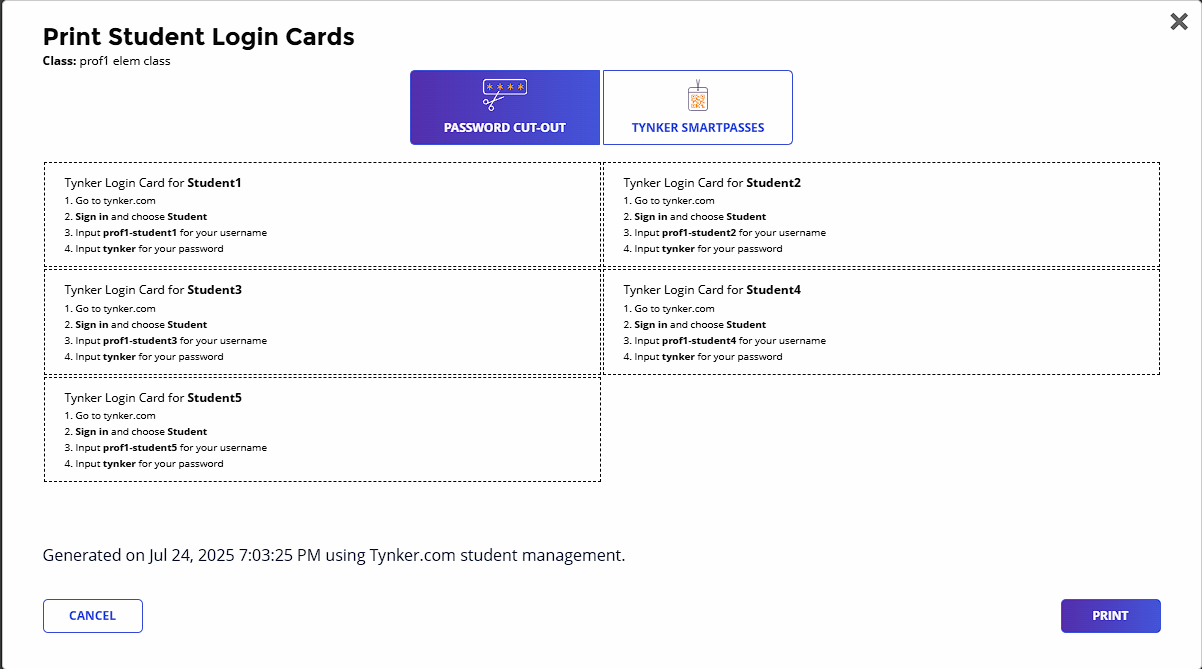
Giving Students Their Login Info
After adding your students, you can print out their login and password information by clicking Print Student Login Cards under the Students tab for each classroom. This creates a document that you can give your students.
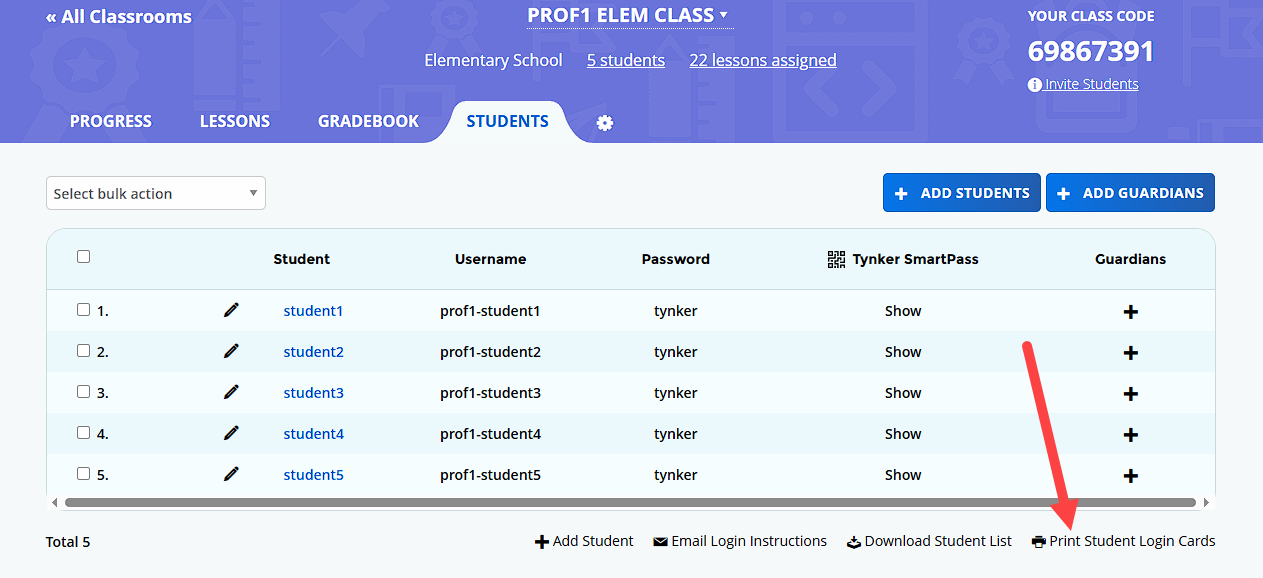
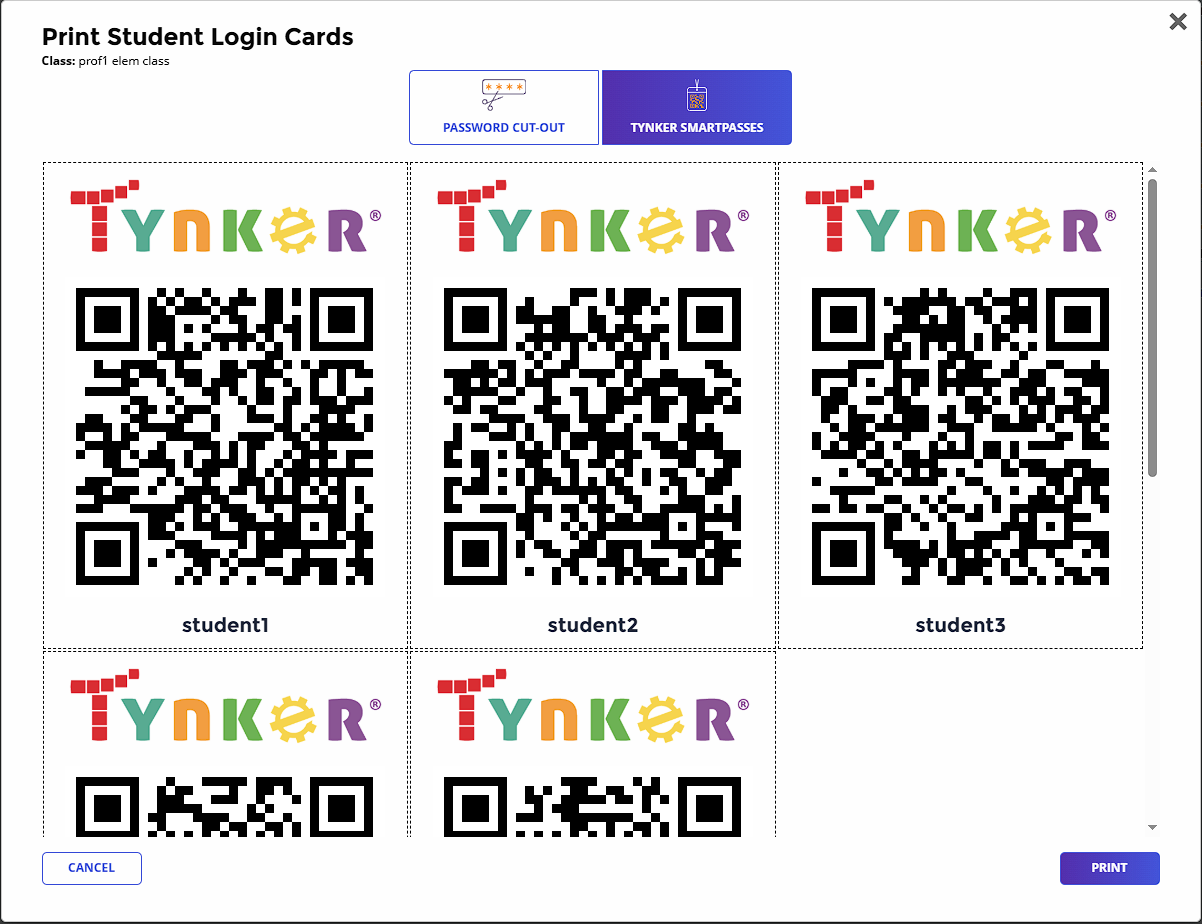
Tynker SmartPass
Tynker SmartPass is a QR Code-based login system where students log in simply by scanning a code. All student accounts support SmartPass logins on Tynker.
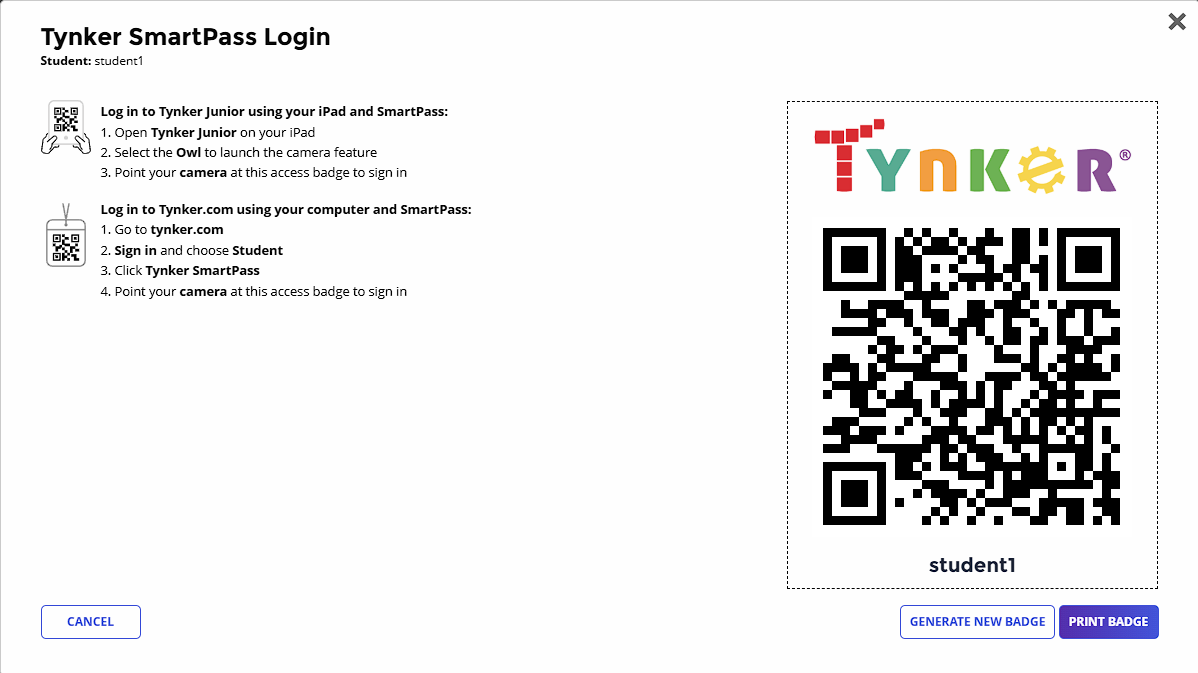
Tynker Smartpass is recommended for younger learners to sign in to their Tynker accounts without any typing. Students can use the camera on their iPad or their computer webcams to scan their own SmartPass code and sign in.
To view the Smart Passcode for your students, go to the “Students” tab of any classroom. You’ll see a new column called Tynker SmartPass. Click Show next to a student’s name, and a pop-up will appear. Now, you can print your student’s QR badge. Only teachers can print badges for their students.
Tynker provides a convenient way to print and manage SmartPass codes for all students with Tynker accounts.
Step 3: Assign lessons
You can assign lessons before or after adding students to your classroom. If you are a free user, you will automatically be given access to Programming 100, a beginner coding course appropriate for grades 2–4, Programming 300, our middle school starter course, and Programming 400, our high school starter course. These free courses let you see what it’s like to teach with Tynker. If you are a premium user, you’ll have access to Tynker’s full library of coding courses for all K-12 grades.
To assign a lesson:
Click on Curriculum on the left navigation to land on the Course Catalog. To assign a course click the Assign button, and when prompted select the classroom to assign it to.
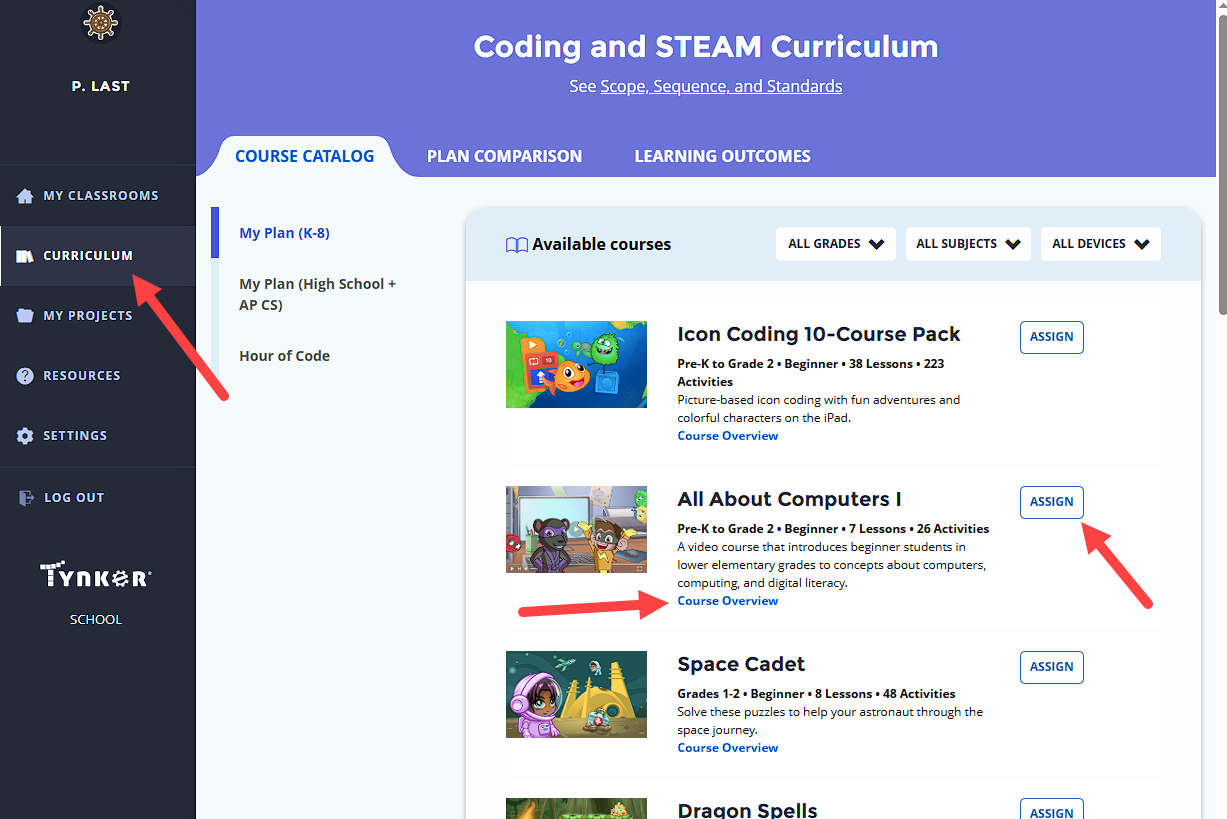
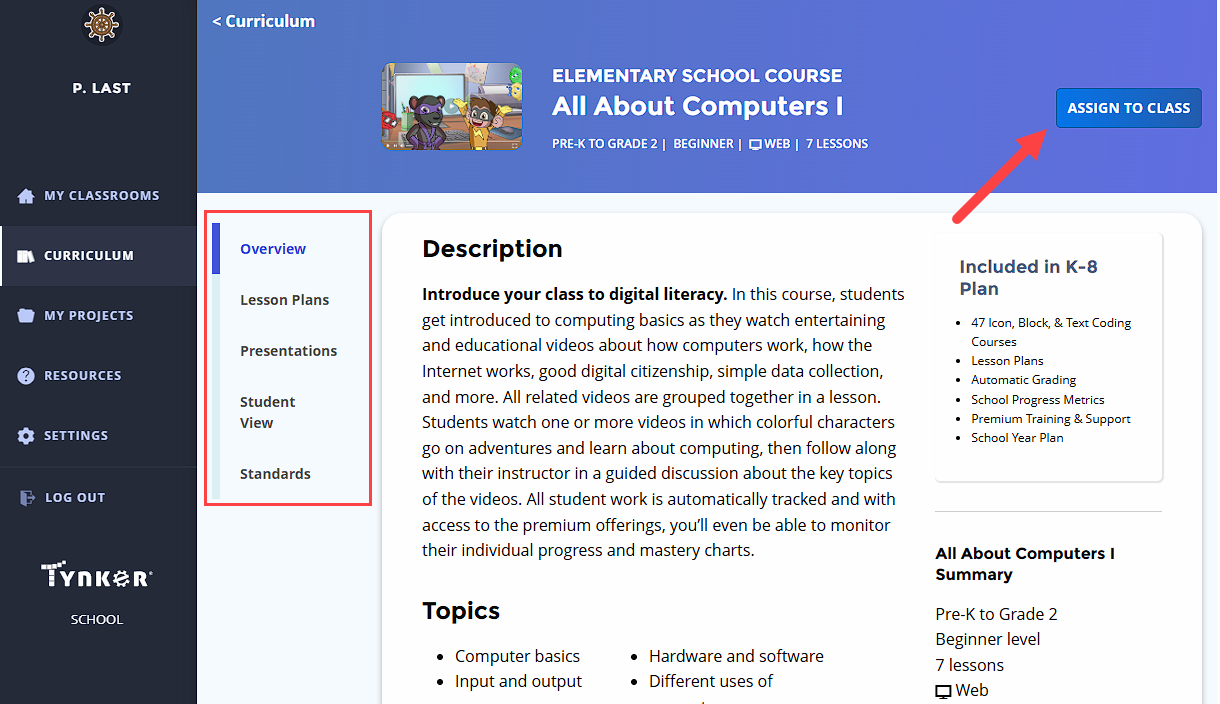
From the Course Catalog clicking on Course Overview for the desired course directs us to a page where we can see course-specific information as well as browse Lesson Plans. We can also assign the course from here via the Assign to Class button.
Assigned courses and lessons will automatically appear in the dashboards of all the students in the specified classroom.
Step 4: Monitor student progress
The Gradebook is a convenient way to track progress metrics for individual students and the class as a whole.
To access these metrics:
Click on any one of your classrooms.
Click on the Gradebook tab.
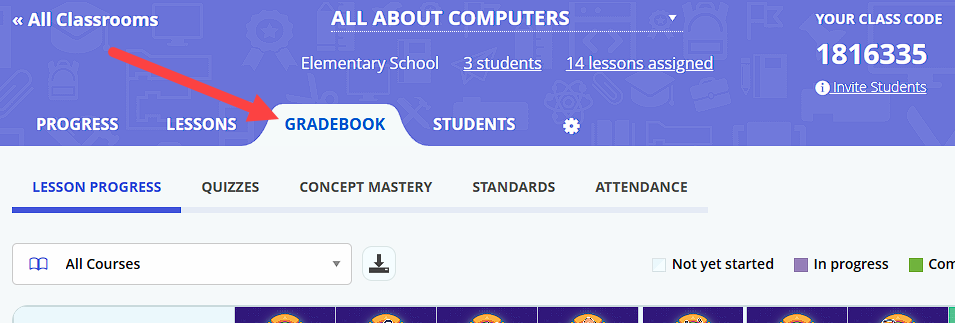
Choose which metric you want to see.
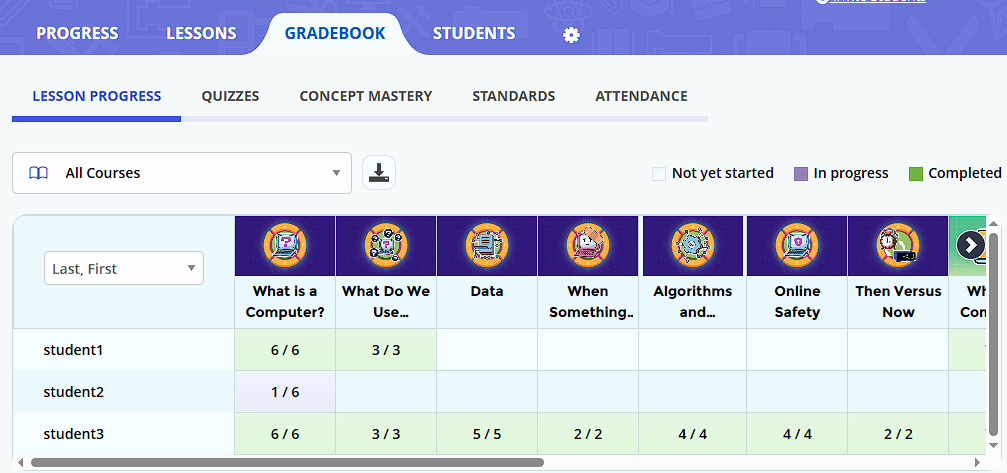
Lesson Progress
The lesson progress tab lets teachers see students' progress at a glance. Empty cells indicate lessons that haven't been started yet, purple cells indicate progress, and green cells indicate completed lessons.
Hour of Code
If your students have used Tynker’s Hour of Code activities, you can see their progress by selecting Hour of Code in the dropdown menu.
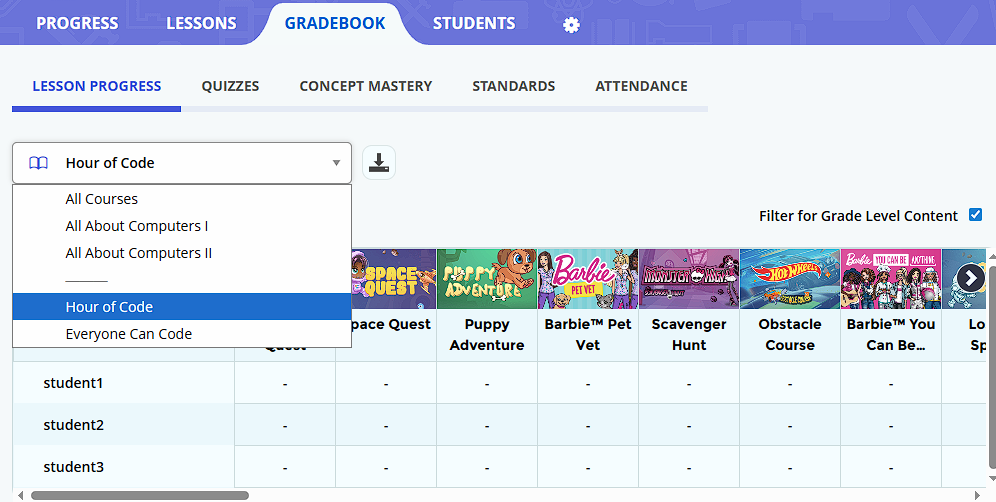
Everyone Can Code
If your students have used Space Cadet or Dragon Spells, our two courses designed for the Everyone Can Code program from Apple, you can monitor their progress by selecting from the dropdown menu as well.
Quizzes
The quizzes tab breaks down your classroom’s programming performance for a quick and easy overview of individual progress.
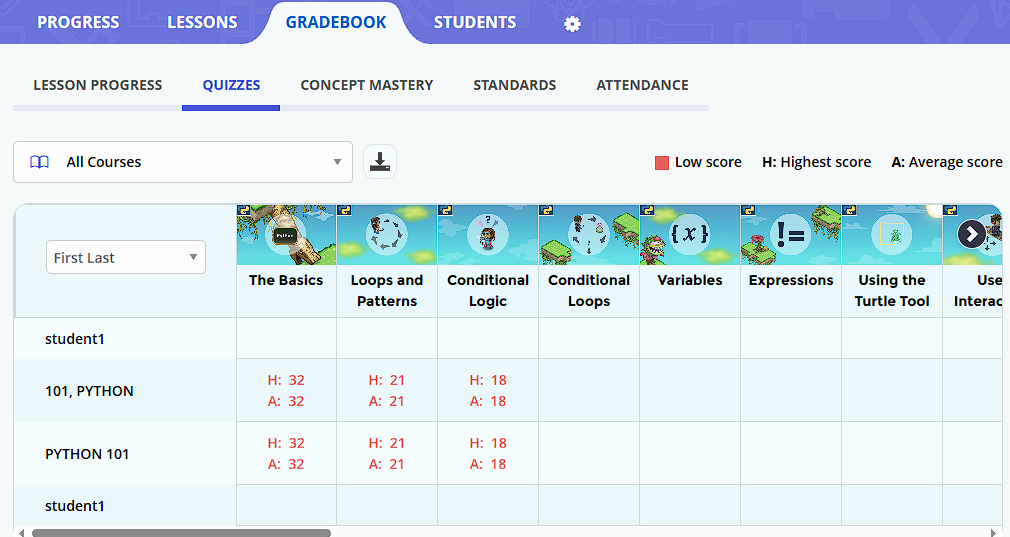
From this view, you can also check each student’s quiz results/attempts. Plus, Tynker tracks high and average scores for each quiz.
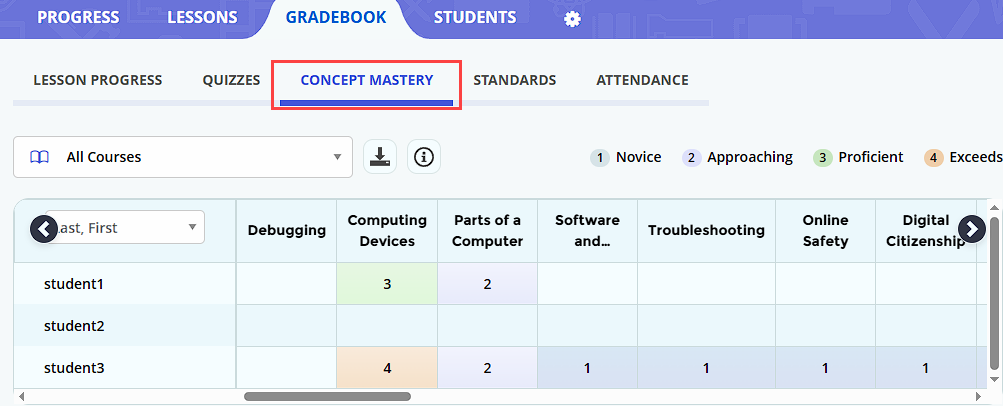
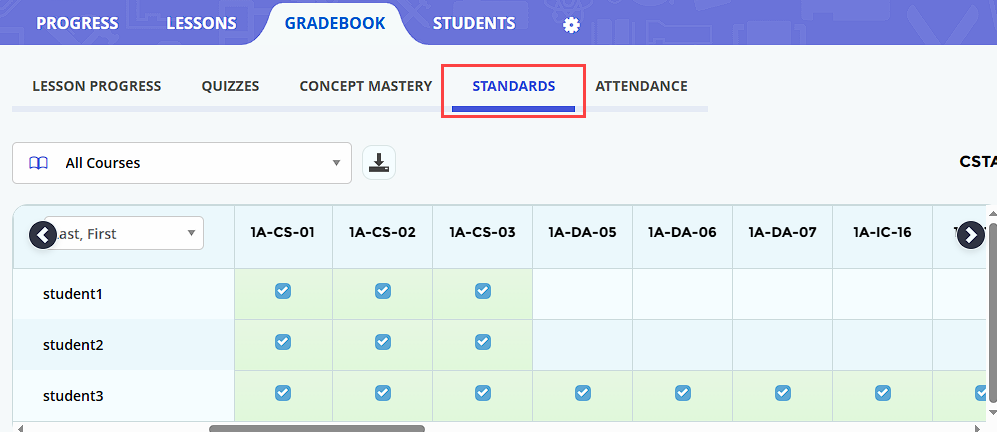
Concept Mastery and Standards
Tynker automatically tracks standards and concept mastery as students complete assignments, code DIY projects, solve puzzles, and take multiple-choice quizzes.
Any questions? We’re here to help!
If you have any questions, just email us at schools@tynker.com.
Tips for contacting support:
Let us know what browser, operating system, and device you’re using.
If your question is about a lesson, specify which course and lesson.
If your question is about an account or project, specify the username and project.
If something’s going wrong, provide us with a screenshot if applicable.
If you receive an error message, tell us what the specific error message is.
If you have problems onboarding students or teachers, send us the CSV file.
Thank you for using Tynker!