
Add, Remove or Edit Students for Tynker Username Accounts
You can add students to an existing Tynker classroom and update a student's name or password.
Add students to a Tynker classroom
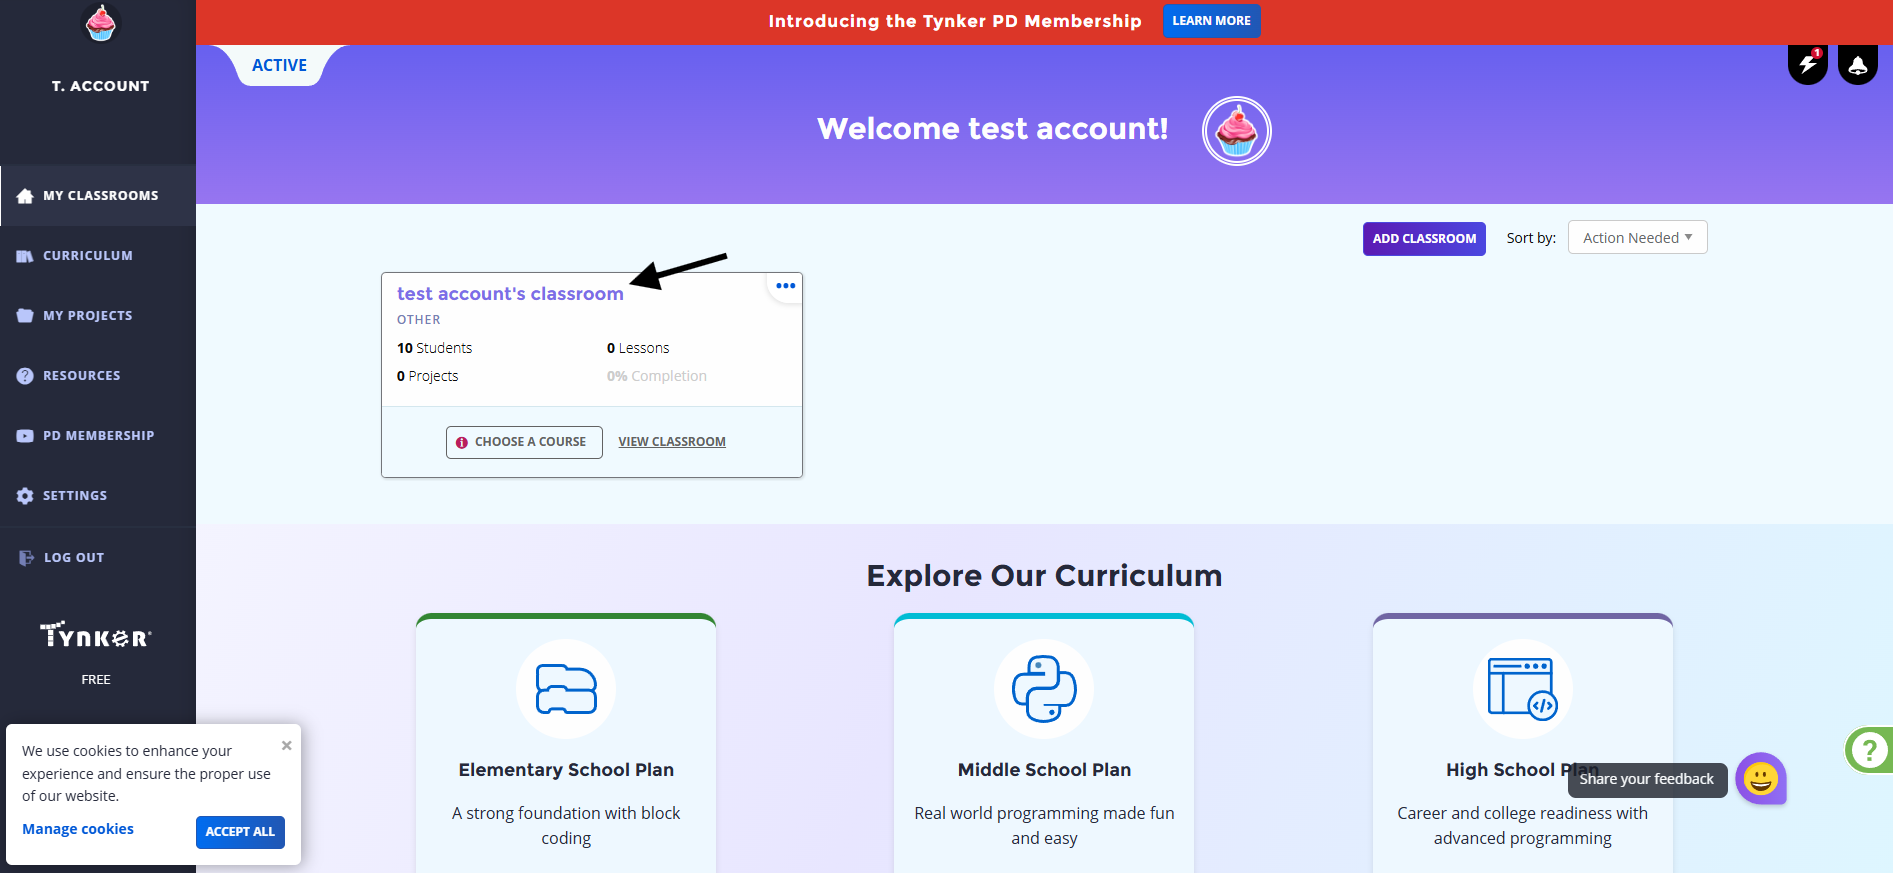
Step 1: Open your classroom
Log in to your Tynker teacher account.
Go to My Classrooms.
Select the classroom where you want to add the students.
Step 2: Open the Students tab
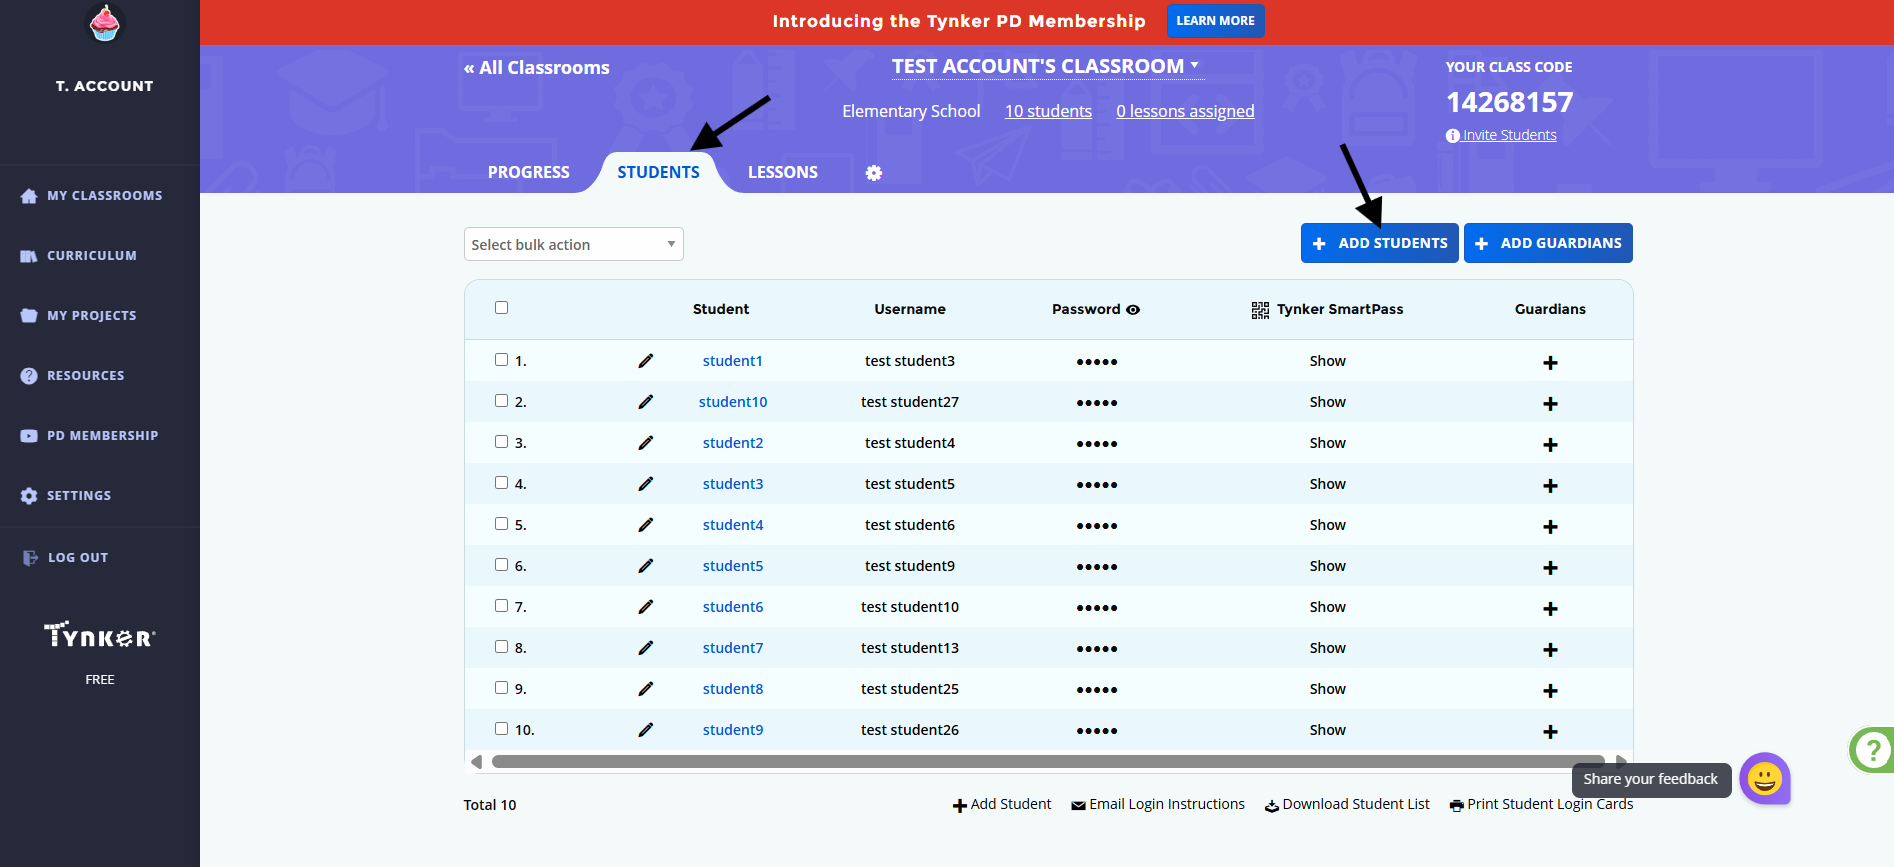
Select the Students tab.
Click Add Students.
Step 3: Create student accounts
Enter the number of students you want to add to your classroom.
You can choose to:
Select Generate for Me to have Tynker generate usernames for your students.
Select Create My Own to create your own usernames.
If you choose Generate for Me, enter the students' first and last names. You can also change the Username prefix or select Regenerate Usernames to generate different usernames.
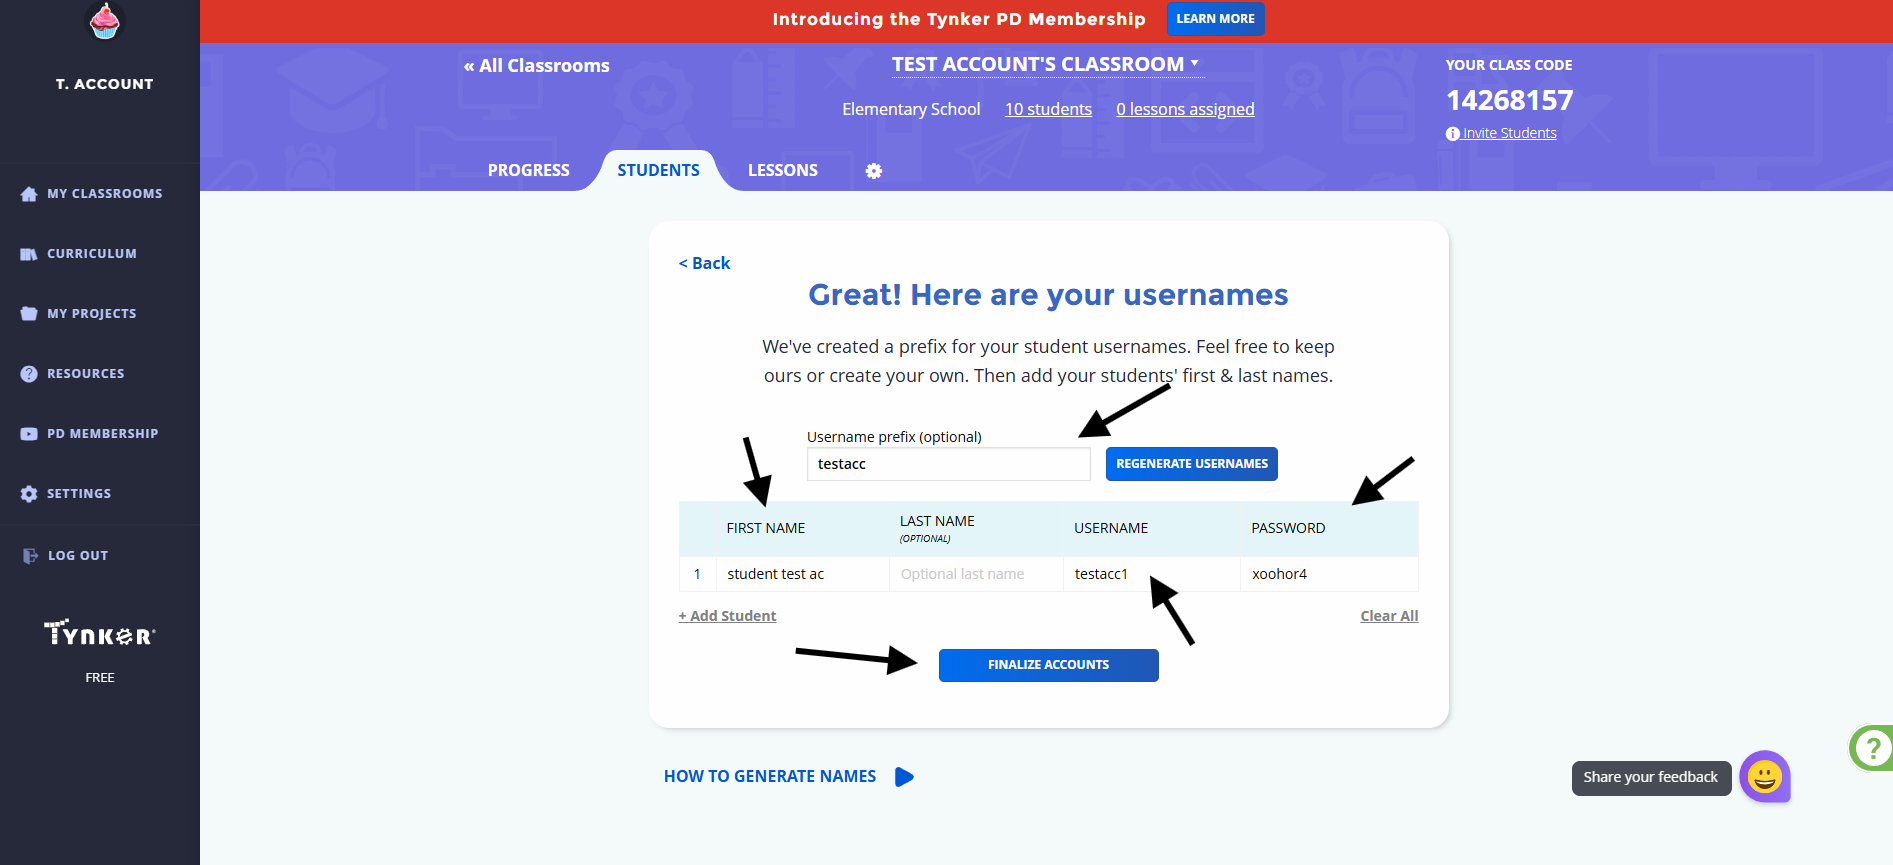
When you have finished entering the student information, click Finalize Accounts.
Step 4: Confirm the students were added
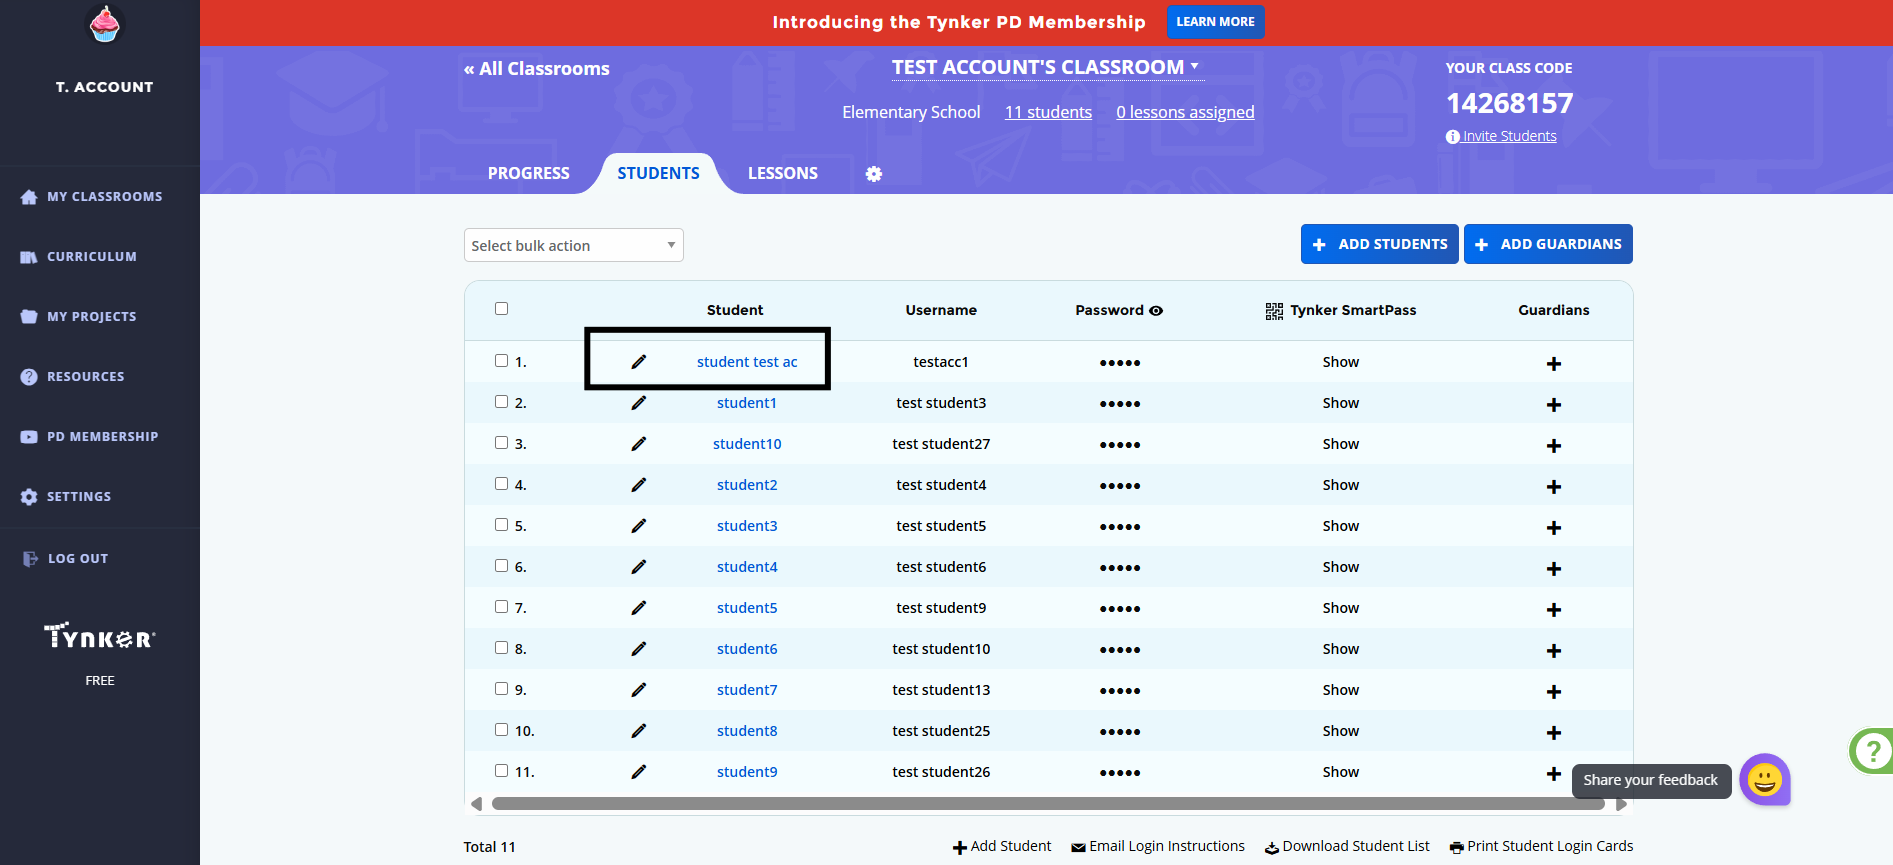
Once the accounts are created, the students will appear in the Students tab.
Edit a student's information
You can update a student's name or password from the Students tab.
Open the classroom and select the Students tab.
Find the student you want to edit.
Click the pencil icon next to the student's name.
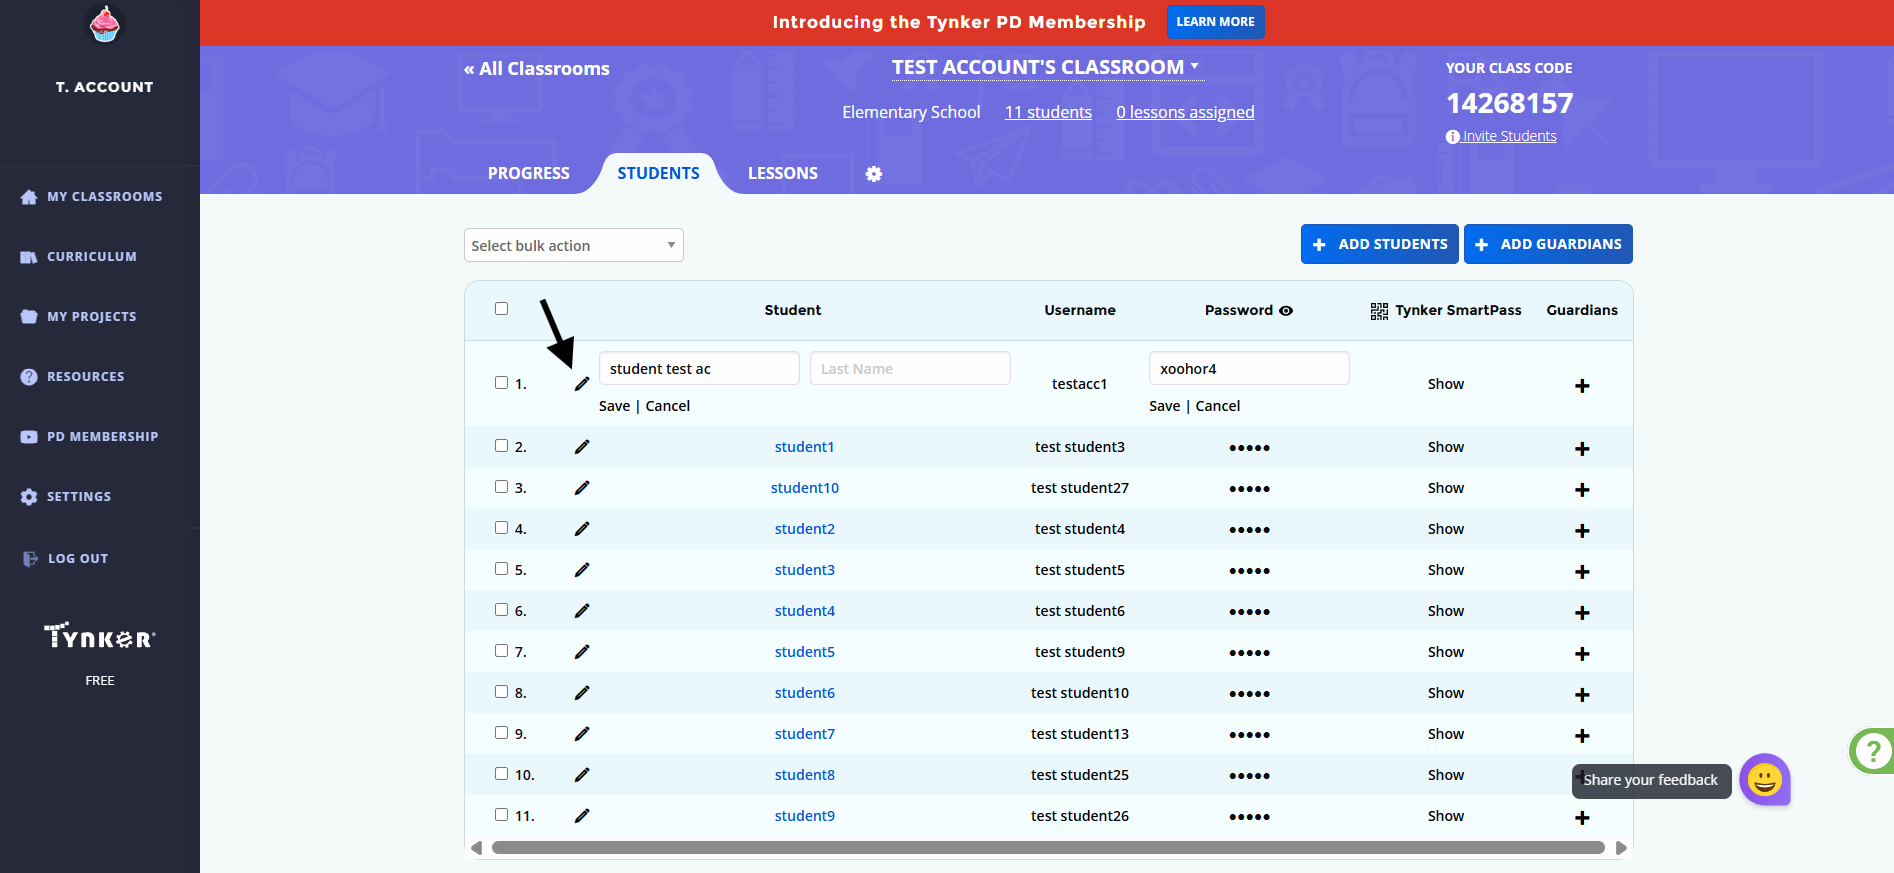
Step 2: Update the student's information
Update the student's first name, last name, or password as needed.
Select Save to apply your changes, or Cancel to discard them.
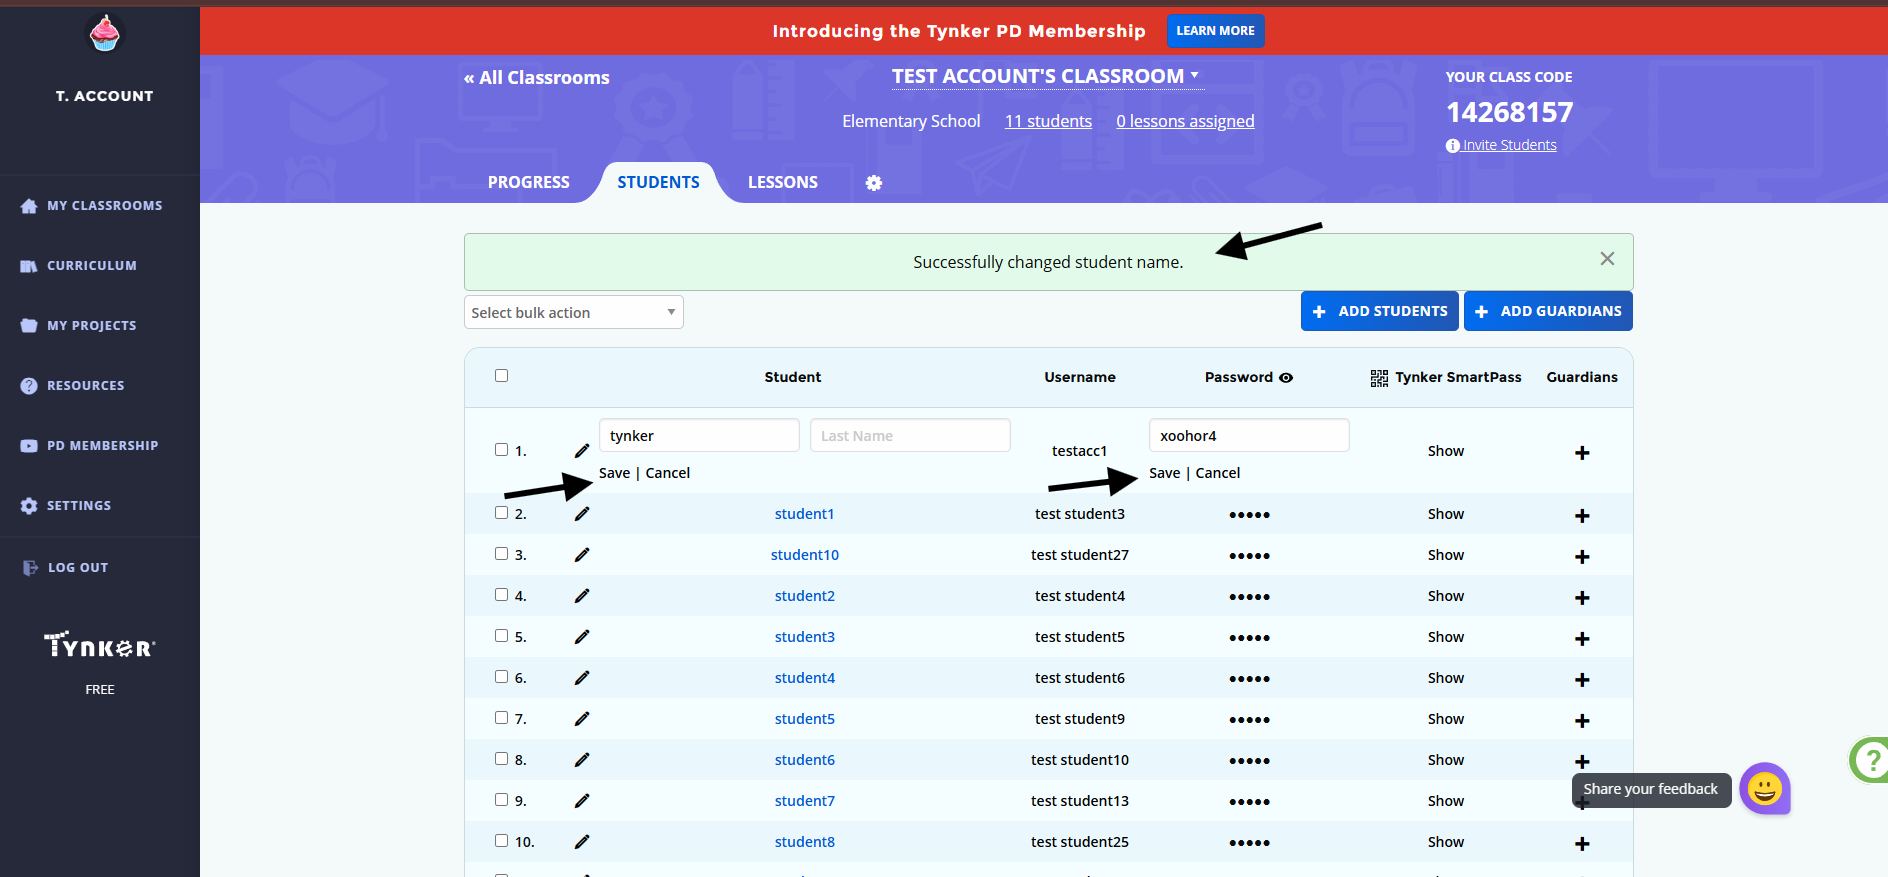
After saving, the updated information will appear in the student list.
Note: You can update a student's name or password, but the student's username cannot be edited.