
Step 3: Roster Your Students
Tynker supports several methods for rostering students to your classrooms. Here you will find everything that you need to start creating your students' accounts:
1️⃣ Class Code: Students can join a class by visiting tynker.com/classcode, entering the class code you provide, and logging in with their existing Google or Microsoft credentials.
Once a Tynker classroom is created, a unique Class Code is automatically assigned to the classroom:
If all of your students have a school Google, Microsoft, or Apple credential, this is a simple way to set up your classroom.
Students with school Google, Microsoft, or Apple credentials can log in for the first time by taking the following steps:
Go to tynker.com/classcode
Enter the Class Code
Click the Google, Microsoft, or Apple button based on the type of credential.
Log in with existing school or district credentials
Students with existing accounts can join this class by clicking on their Join Class button on their My Classes page or from within their profile.
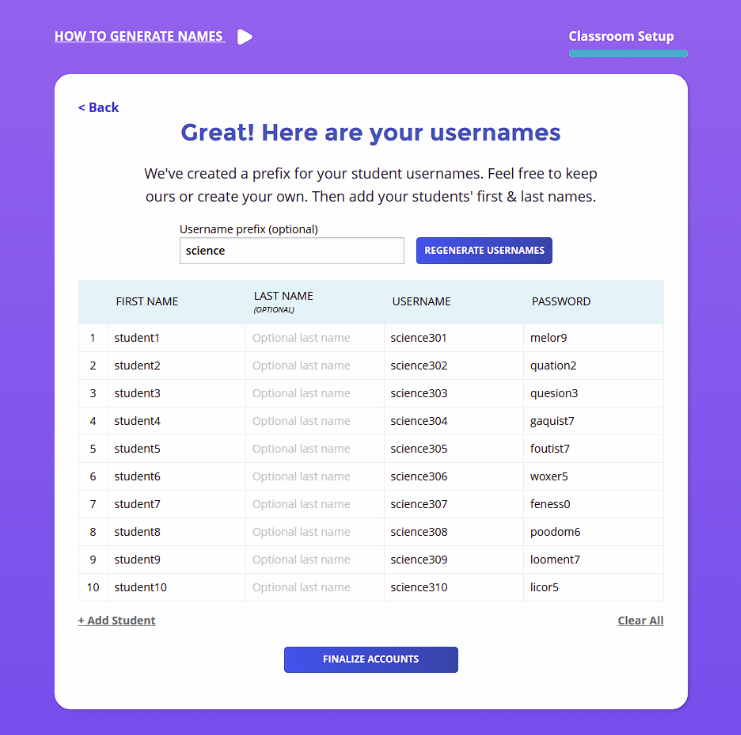
2️⃣ Generate For Me: Allow Tynker to generate usernames and passwords for student accounts. Usernames can be generated with a custom prefix.
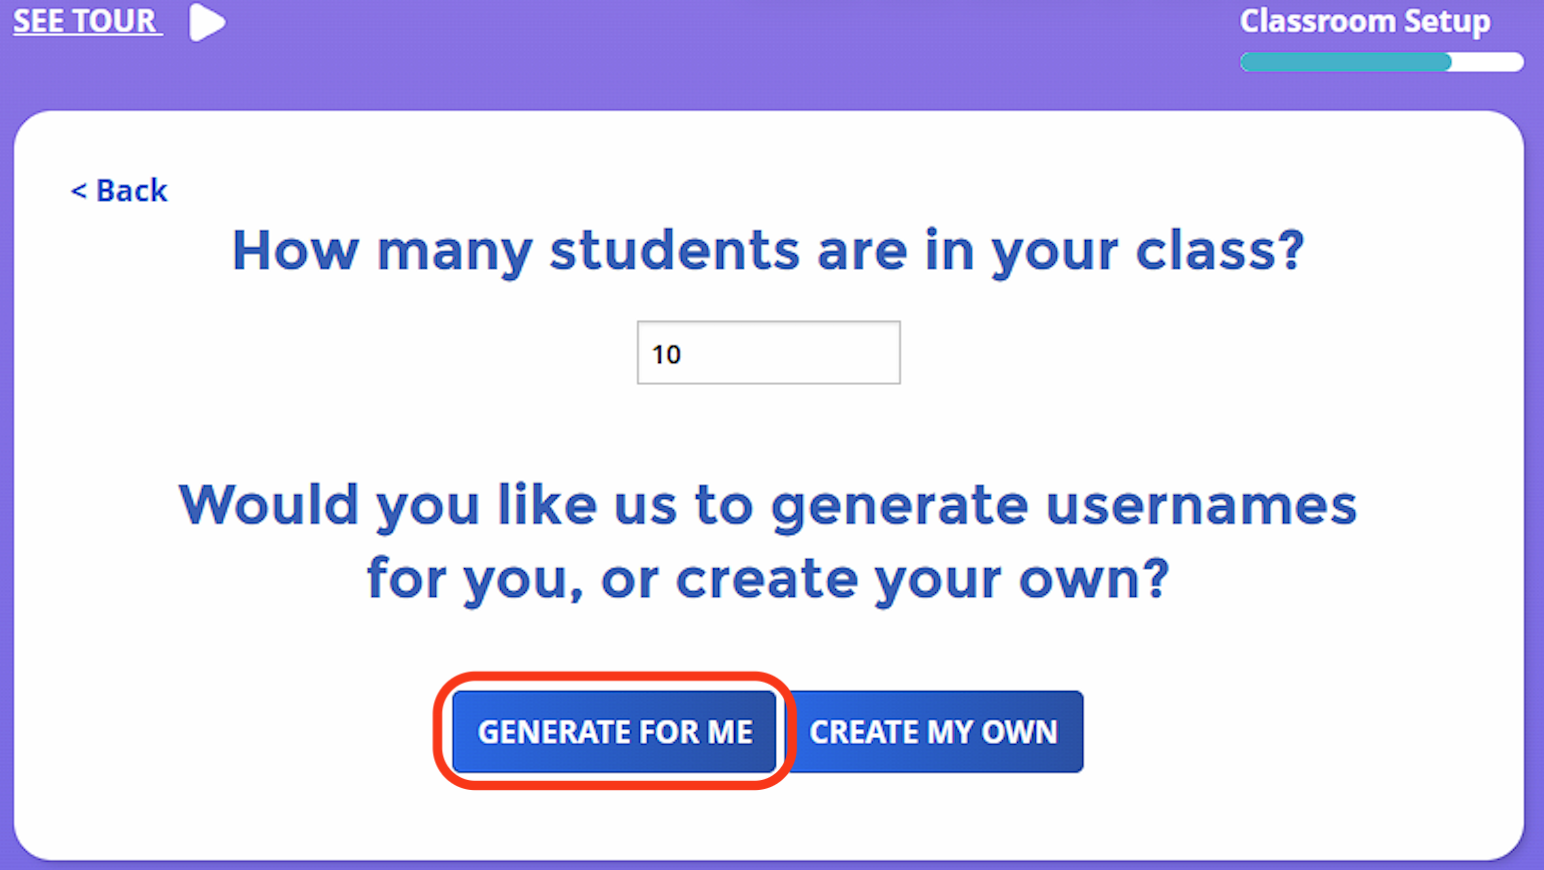
Begin by clicking Create Tynker Accounts. Choose how many accounts you want to create, and use the Generate For Me button. You can choose a prefix for all usernames to start with, and you need to add first names. Click Finalize Accounts to complete adding student accounts.
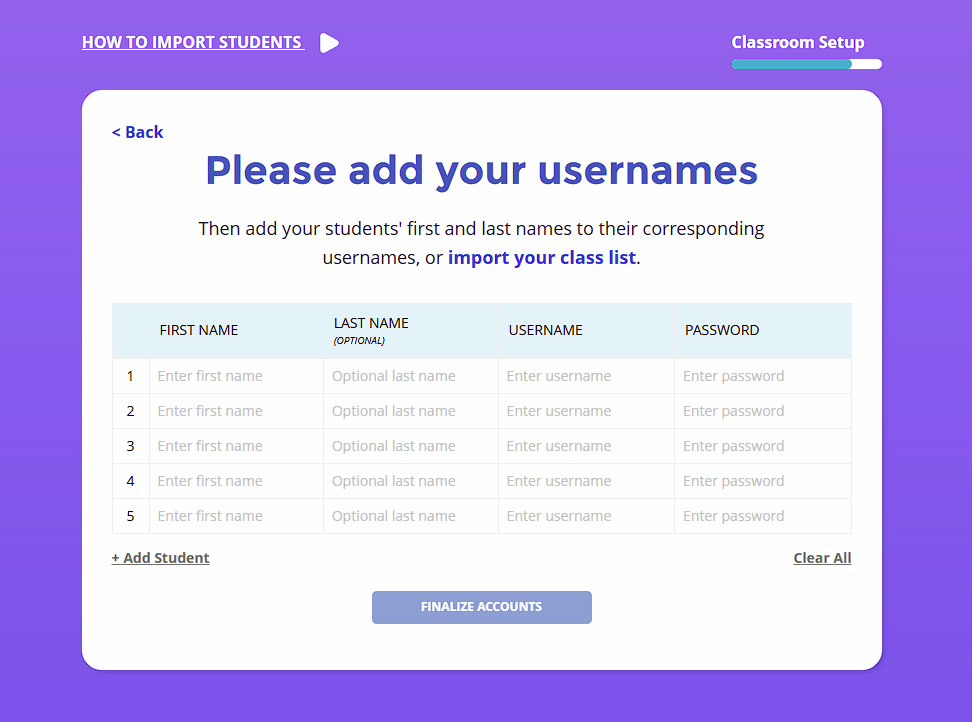
3️⃣ Create My Own: Manually create individual Tynker accounts with custom usernames and passwords
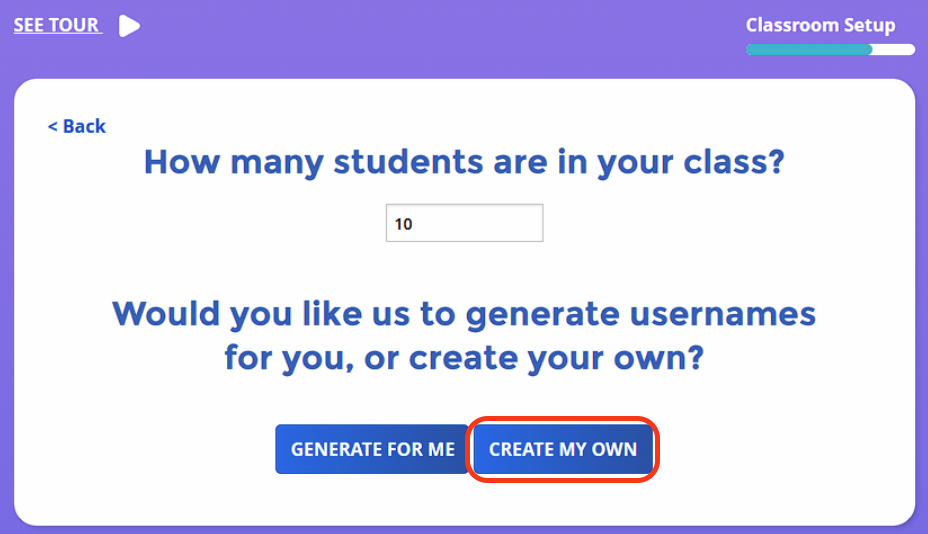
Begin by clicking Create Tynker Accounts. Choose how many accounts you want to create, and use the Create My Own button. Add students' first names, last names, usernames, and passwords. Click Finalize Accounts to complete adding student accounts.
4️⃣ Bulk Import: This method allows you to import all of your students into their respective classrooms using a single CSV file upload. Entire classrooms can be added this way. The following types of imports are supported:
Import students who use Google accounts (Sample CSV)
Import students who use Tynker accounts (Sample CSV)
Here is an example CSV for multiple classrooms, using Google logins for students.
Class | Login |
Big Bird’s Intro to Programming | |
Big Bird’s Intro to Programming | |
Big Bird’s Intermediate Coding |
To perform a bulk import, follow these steps:
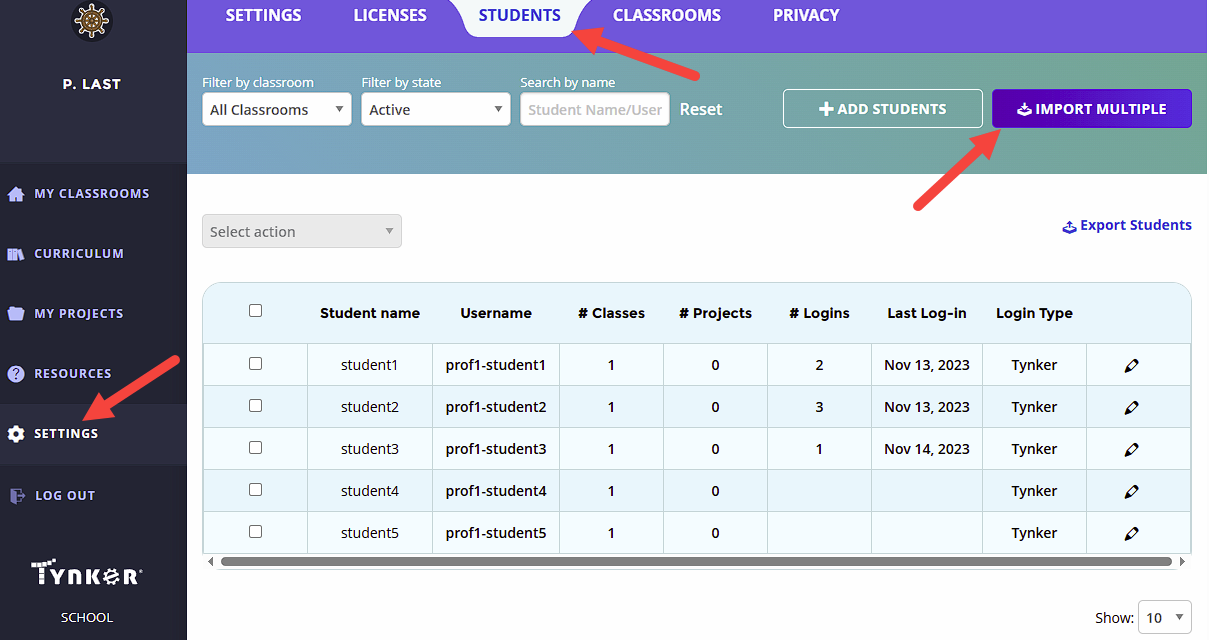
Click on Settings in your left navigation panel.
Click on the Students tab.
Click Import Multiple to initiate the bulk-import wizard.
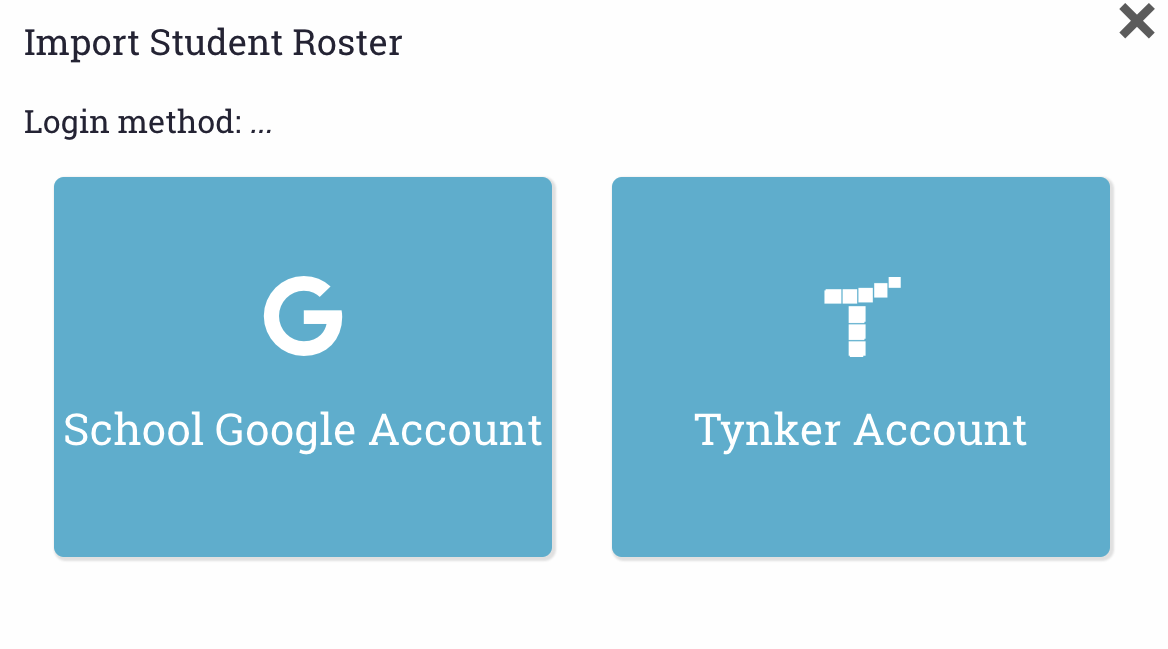
Choose a login method for students. Note that if you select Google Accounts rather than Tynker Accounts, you’ll only have to enter student emails into the CSV file. Use the samples provided to add your students.
Use Google Sheets or a spreadsheet editor like Microsoft Excel to add all the students under the headers. The only fields that can be left blank are the passwords, which, if you don’t fill them in, will be automatically generated.
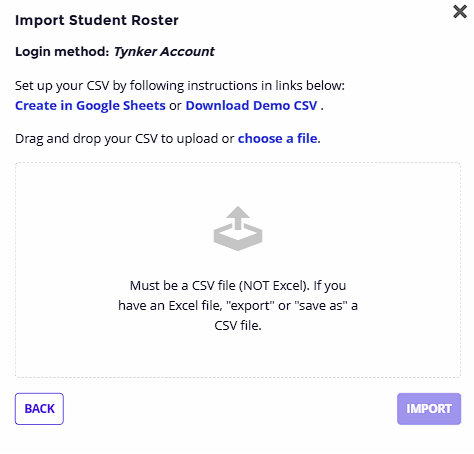
Download/save the file as a CSV file.
Upload your CSV file formatted exactly like the demo CSV file.
Click Import to start the bulk import.
If there are any errors, you’ll be notified by the Preflight Error Checking process.
*You can use any combination of these methods.
The tools will work for both new and existing accounts. When you add students, the system automatically checks whether the information you enter is associated with an existing student account. Existing accounts are updated with new classroom information and don’t lose any previous class data. All other accounts are generated and added to the classroom. That means you can use these tools again whenever a new semester begins.
Note: Don’t add your Teacher account as a student in your own classroom. You’ll be able to go through any lesson module that students can access from your educator dashboard.